0613_AR_Lionflakes

Last time, we made a box named lionflakes.

KakaoTalk_Photo_2016-06-18-22-07-52_41

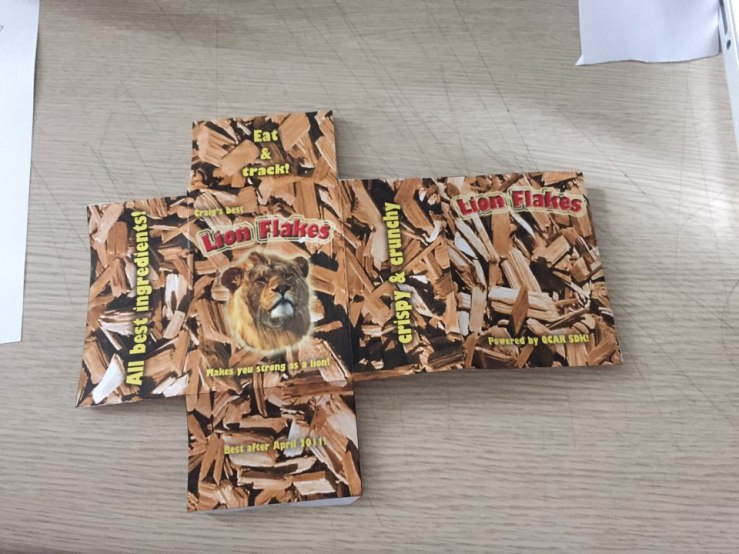
I cut the development paper,

KakaoTalk_Photo_2016-06-18-22-07-53_14

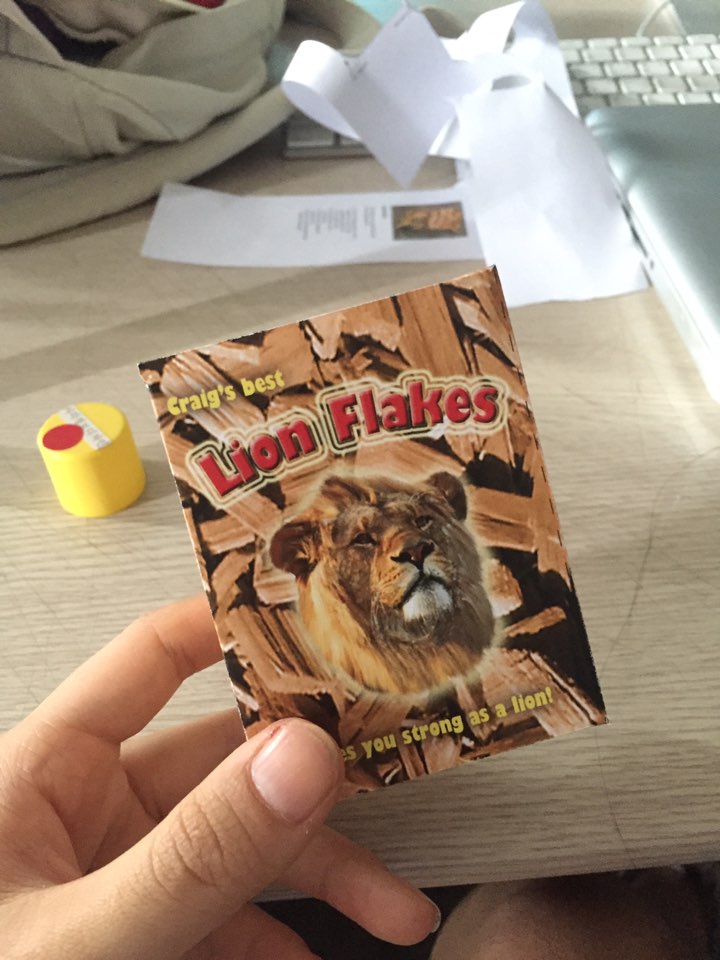
And glue it. This is the complete work of lionflakes. We will make a AR using this box.

스크린샷 2016-06-13 오전 10.33.16

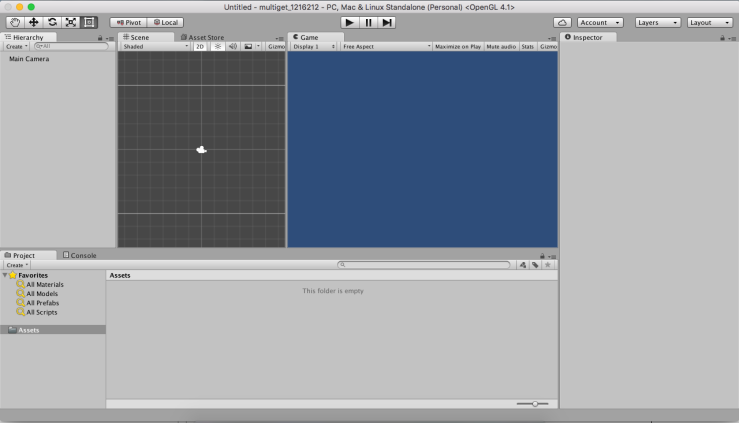
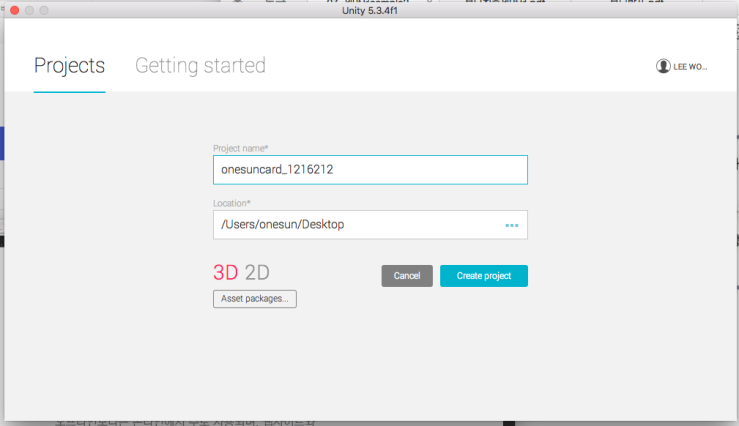
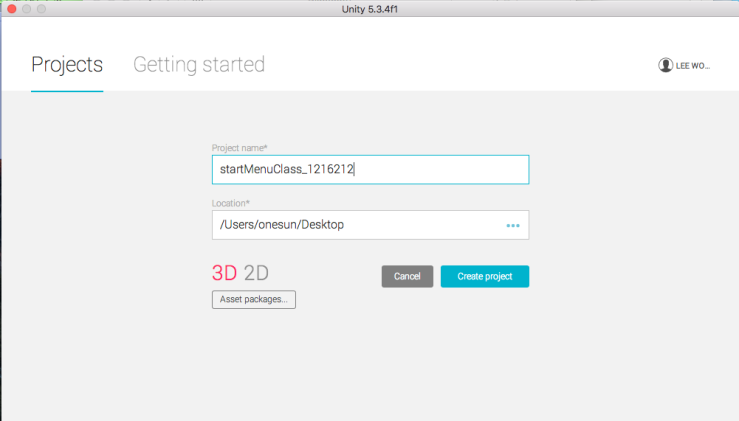
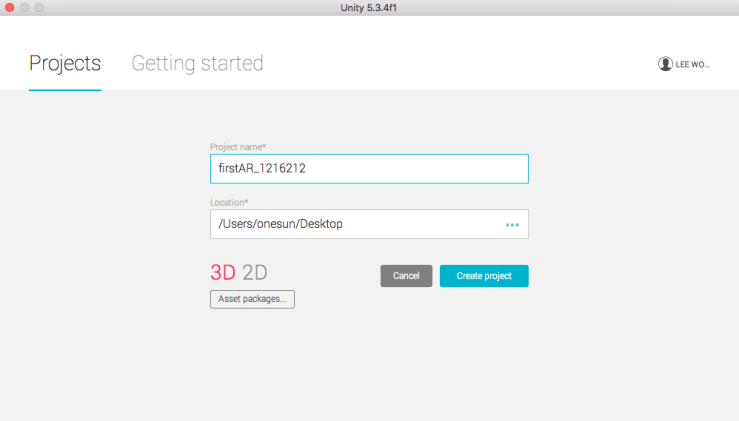
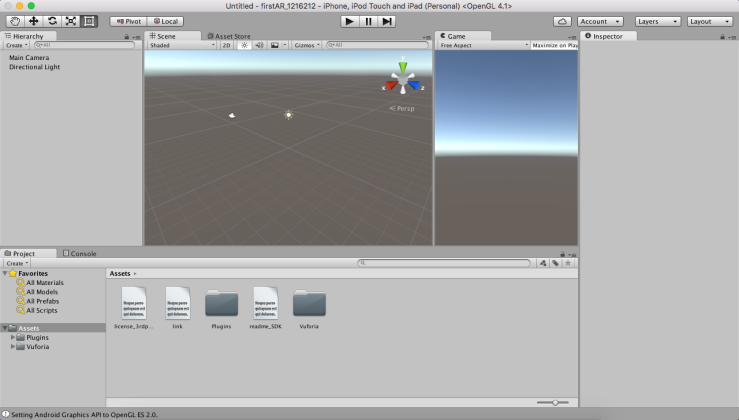
First, make a new project.

스크린샷 2016-06-13 오전 10.33.38

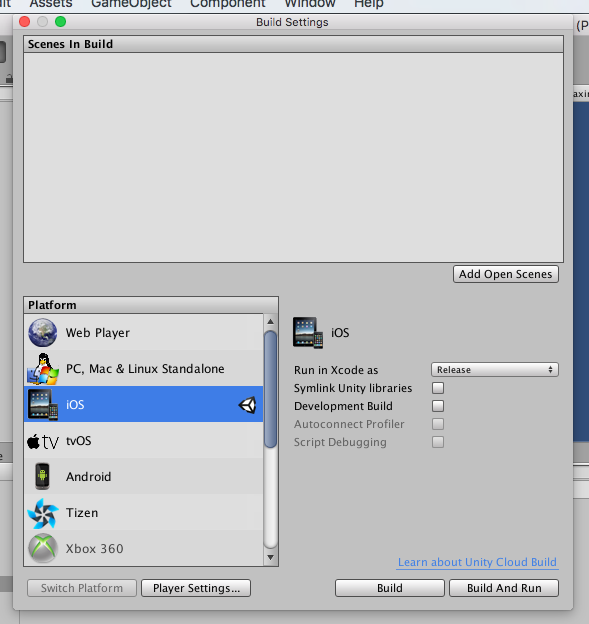
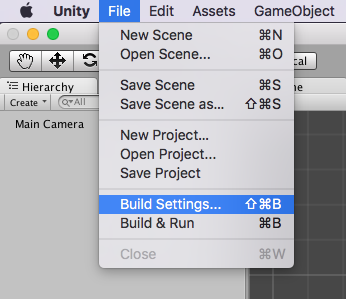
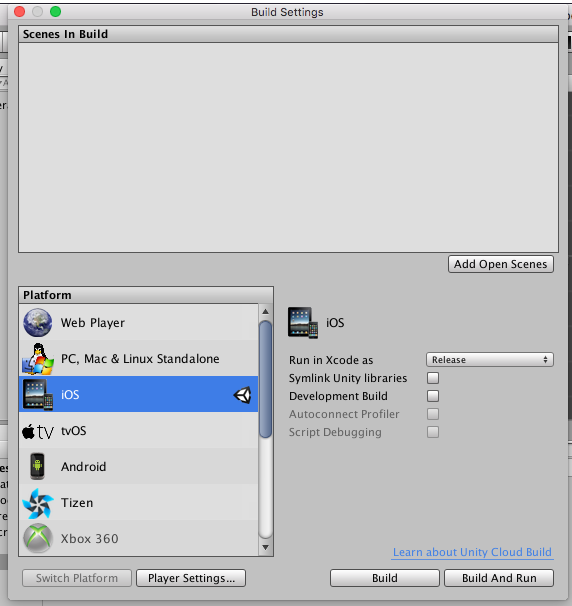
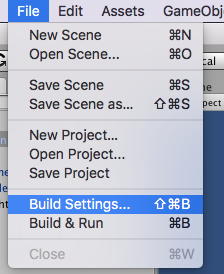
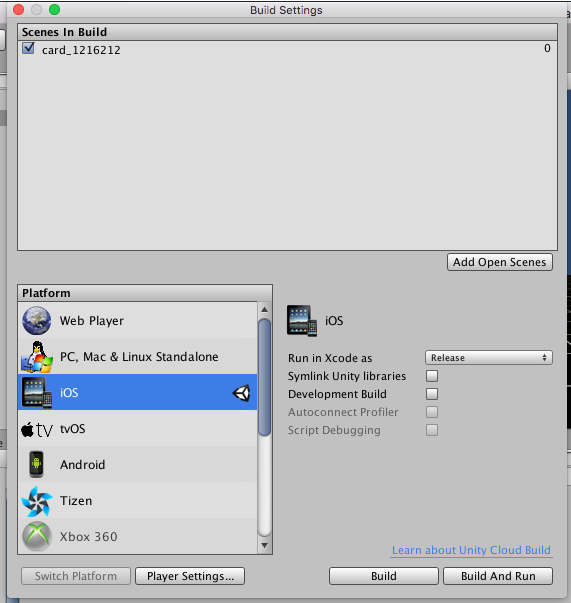
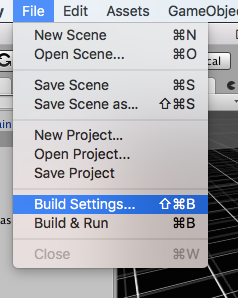
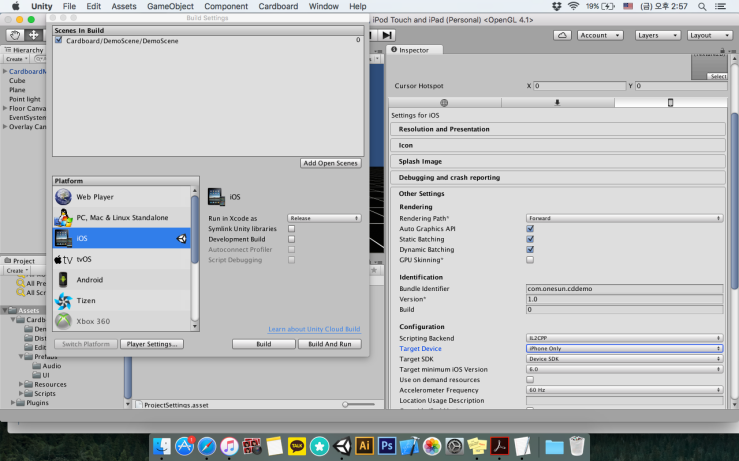
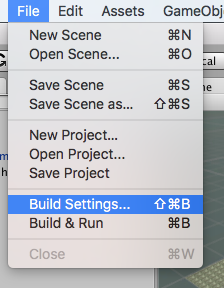
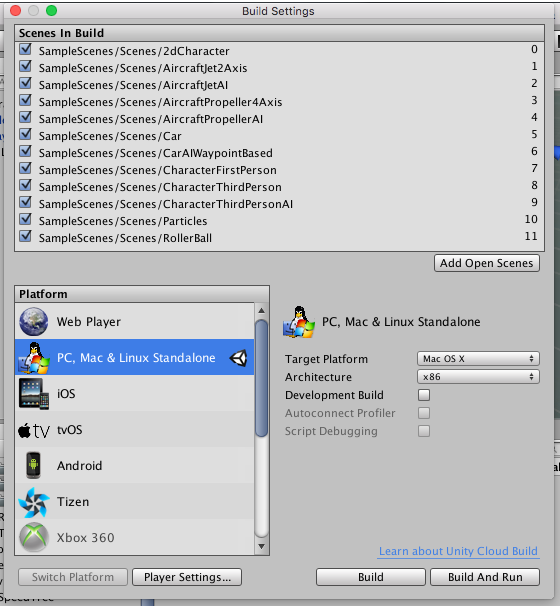
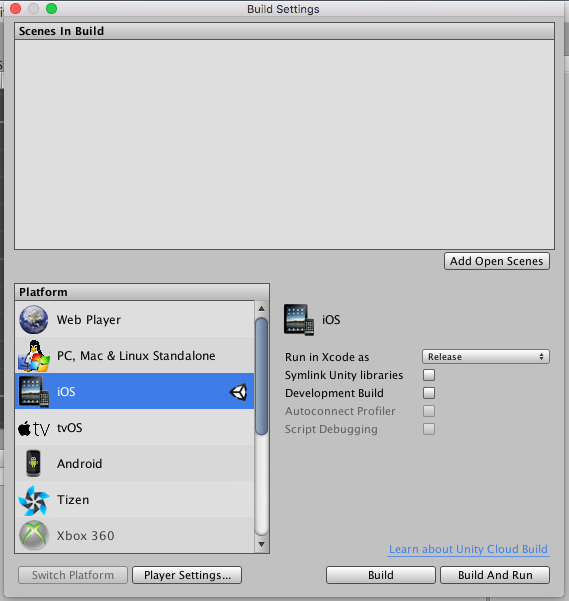
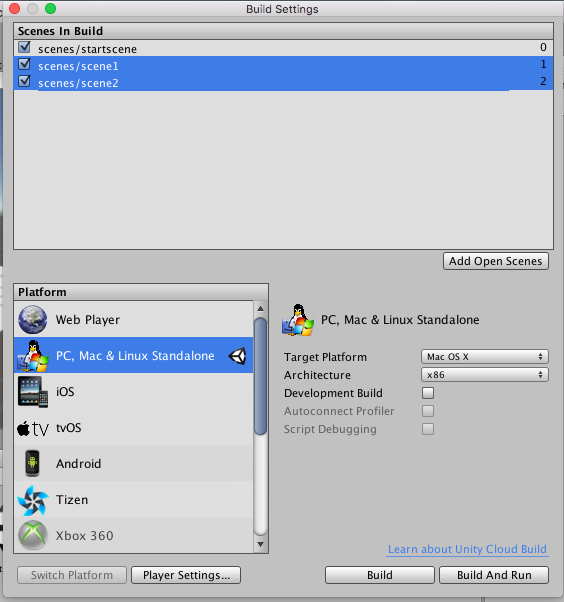
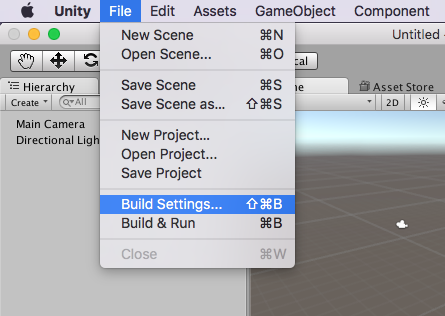
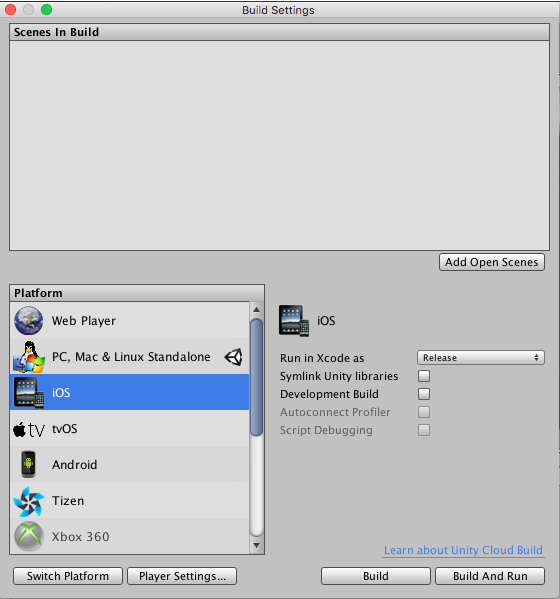
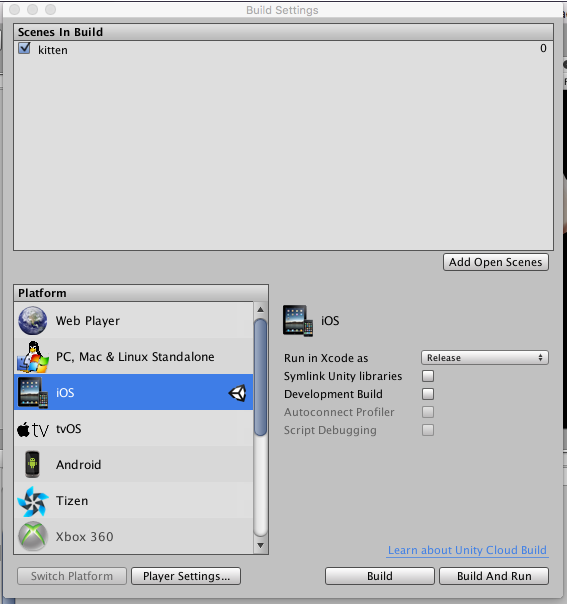
Go to build settings and change platform into iOS.

스크린샷 2016-06-13 오전 10.34.04

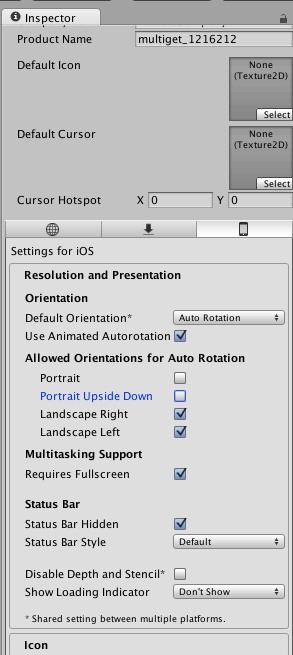
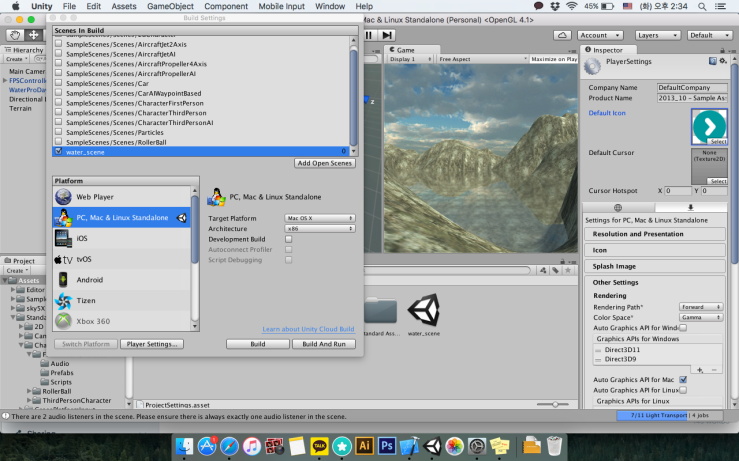
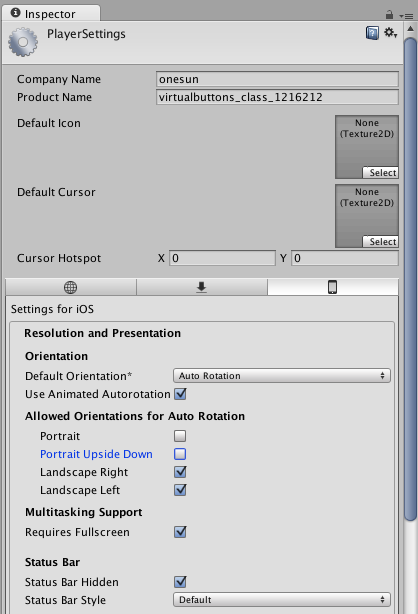
Next, go to player settings and uncheck portrait and portrait upside down.

스크린샷 2016-06-13 오전 10.34.20

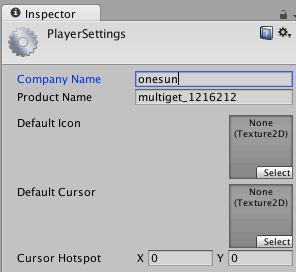
Don’t forget to change company name and project name!

스크린샷 2016-06-13 오전 10.34.36

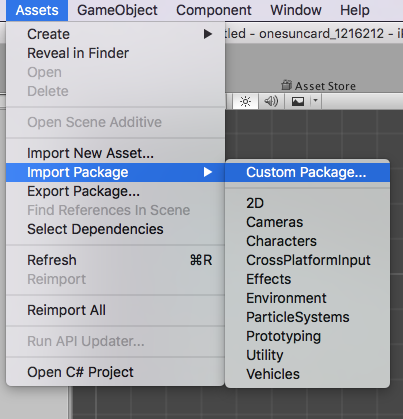
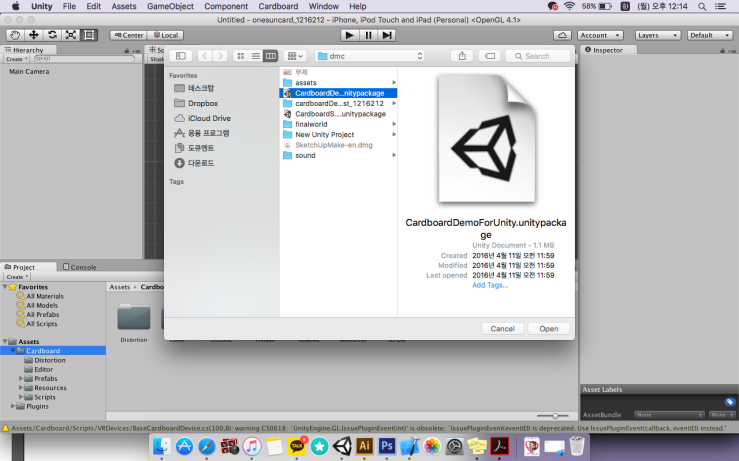
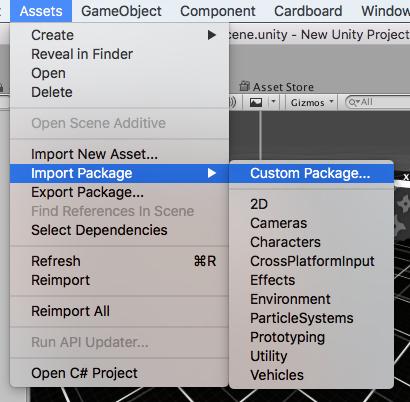
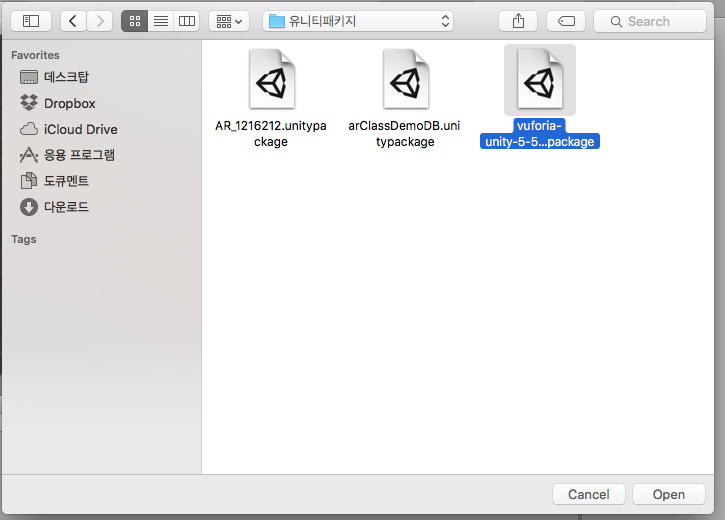
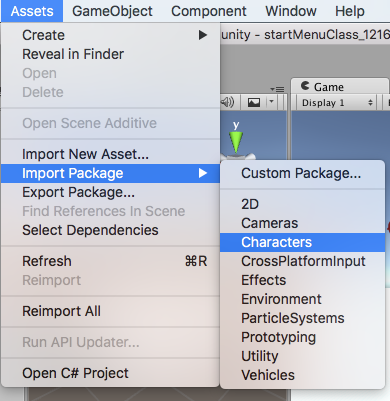
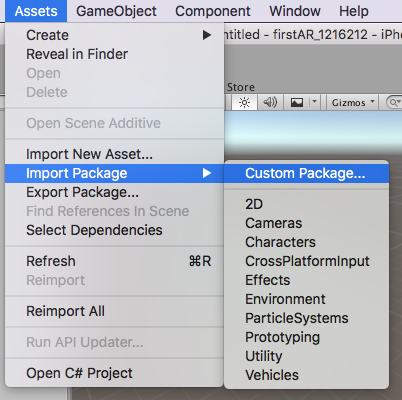
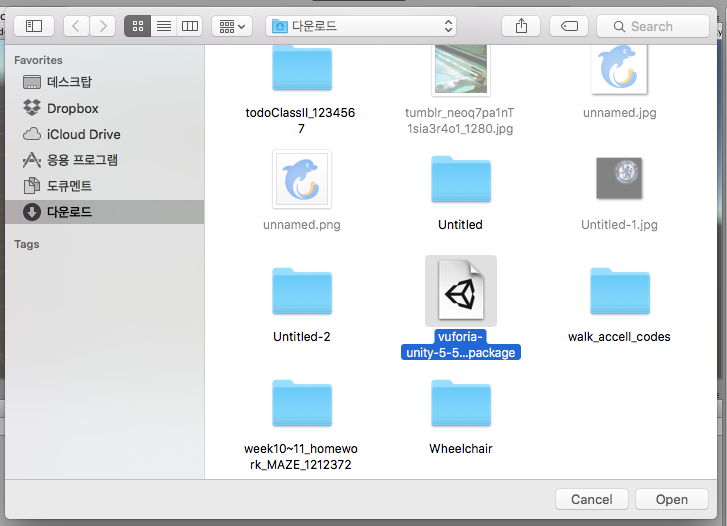
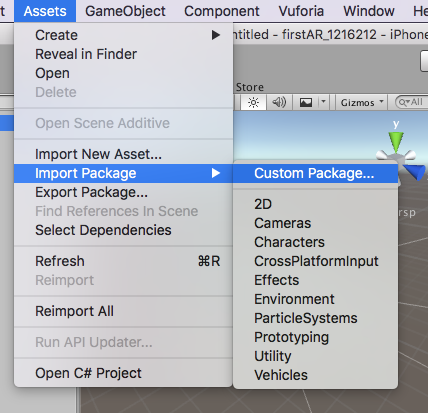
Next, go to assets > import package > custom package.

스크린샷 2016-06-13 오전 10.35.24

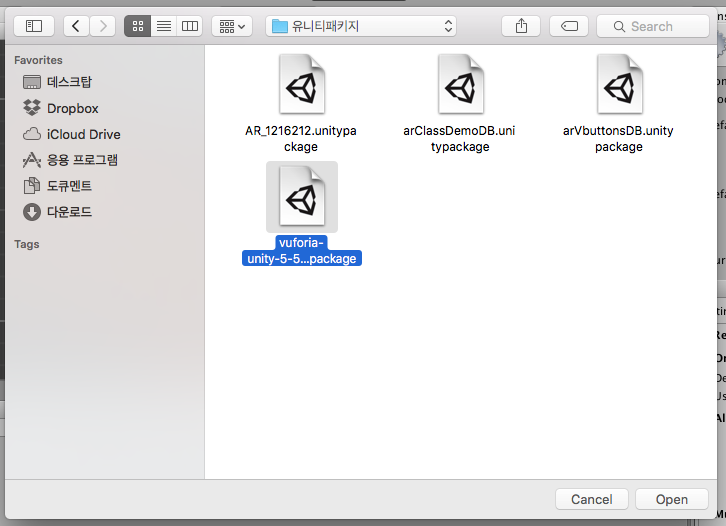
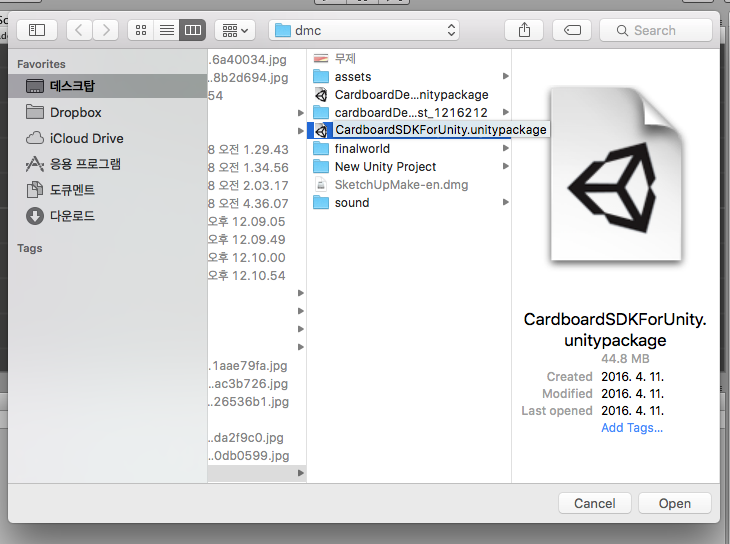
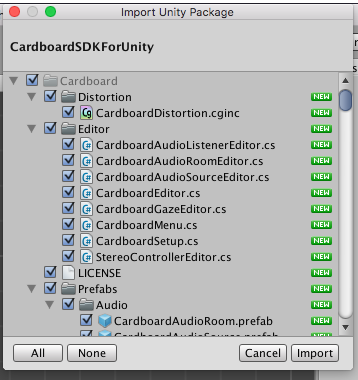
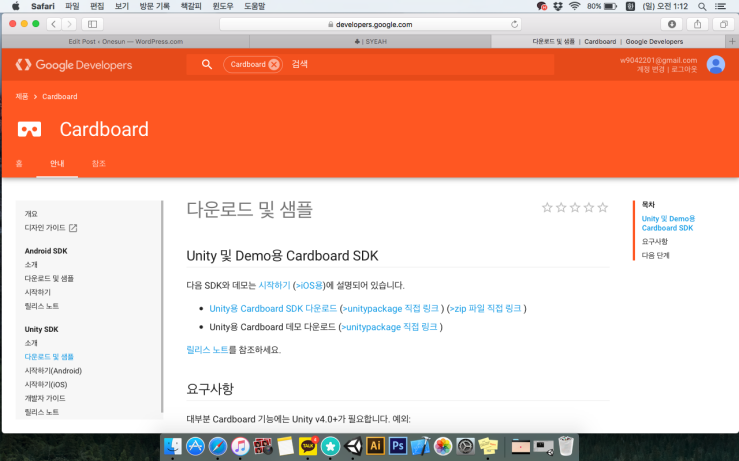
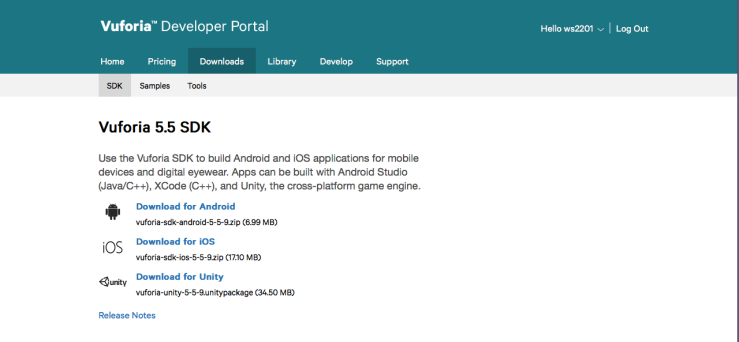
Import vuforia unity package that we downloaded in Vuforia website.

스크린샷 2016-06-13 오전 10.42.57

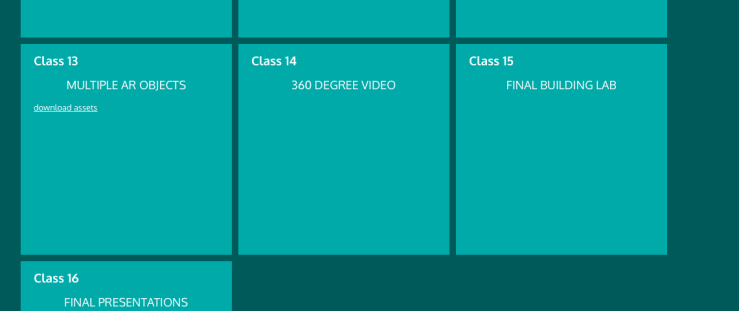
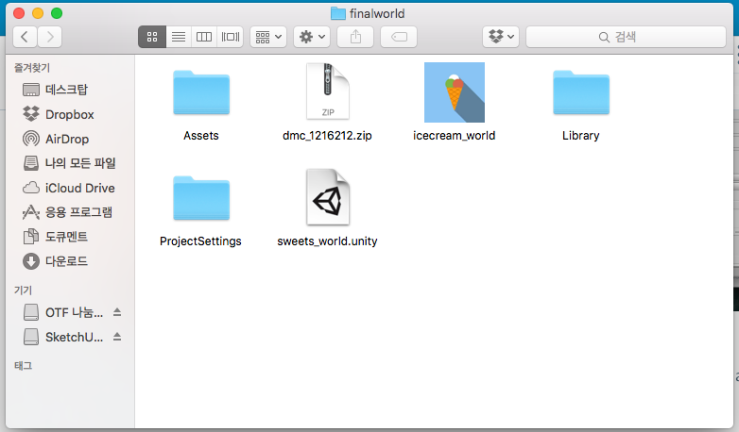
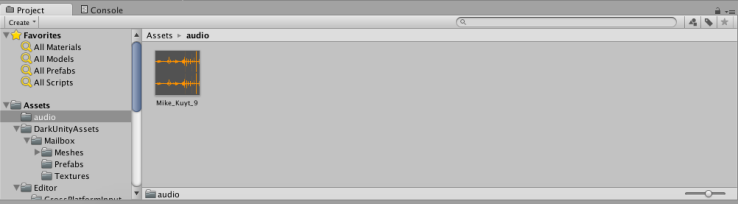
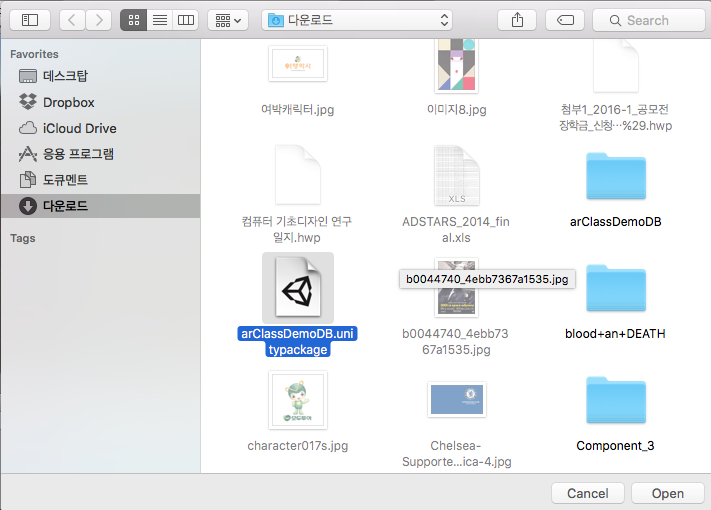
Go to class website and download the file in Class 13.

스크린샷 2016-06-13 오전 10.43.52

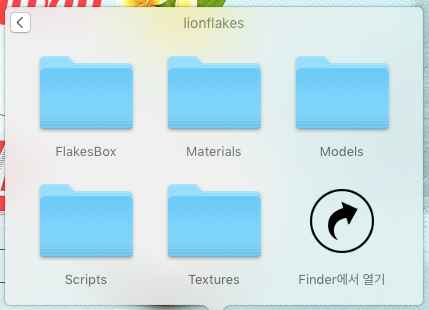
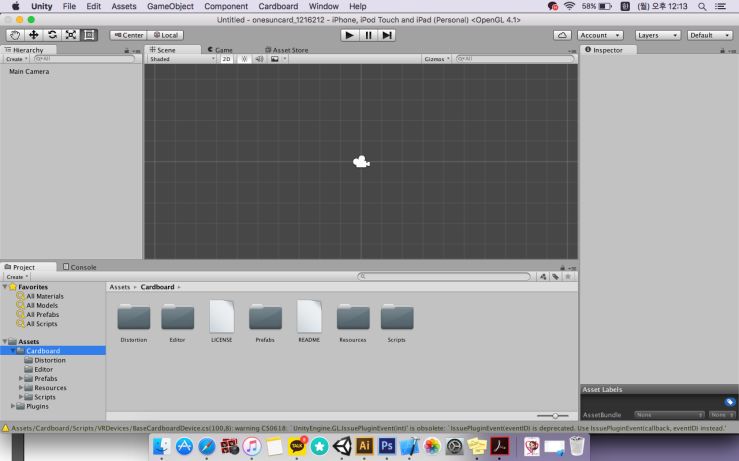
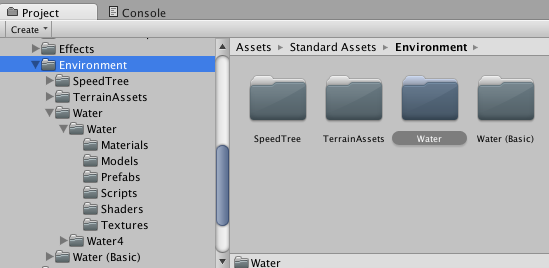
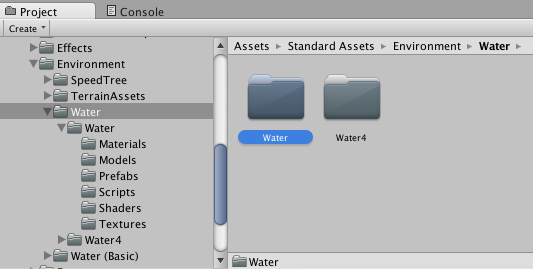
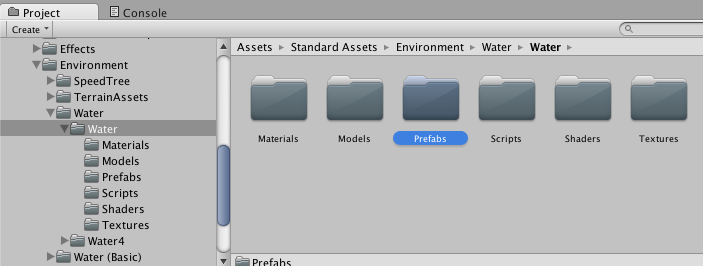
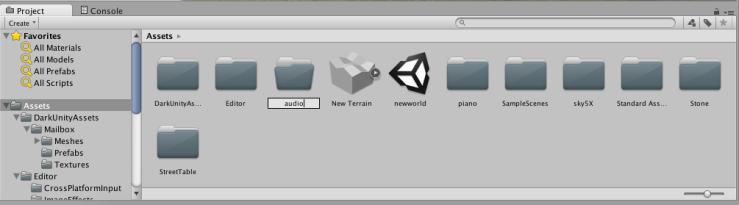
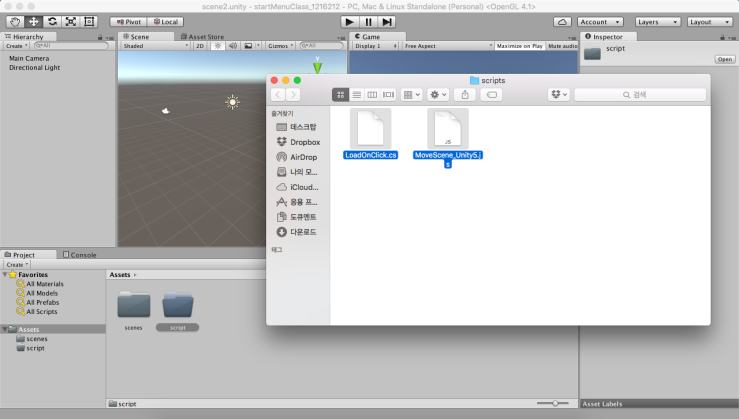
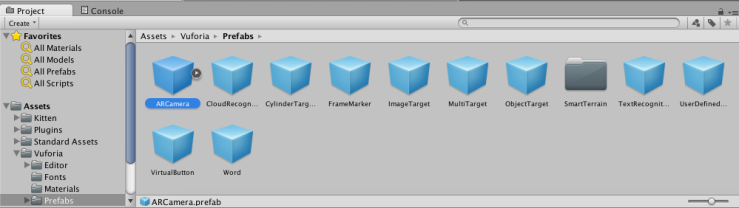
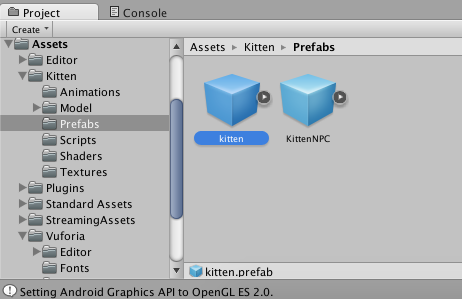
You will see this folders when you download it.

스크린샷 2016-06-13 오전 10.48.24

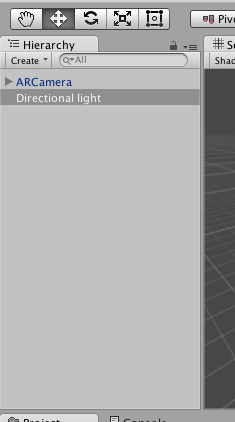
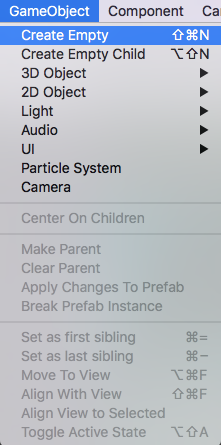
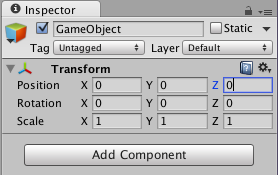
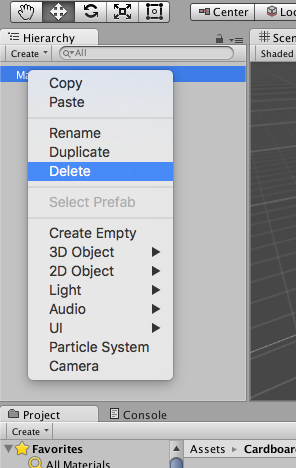
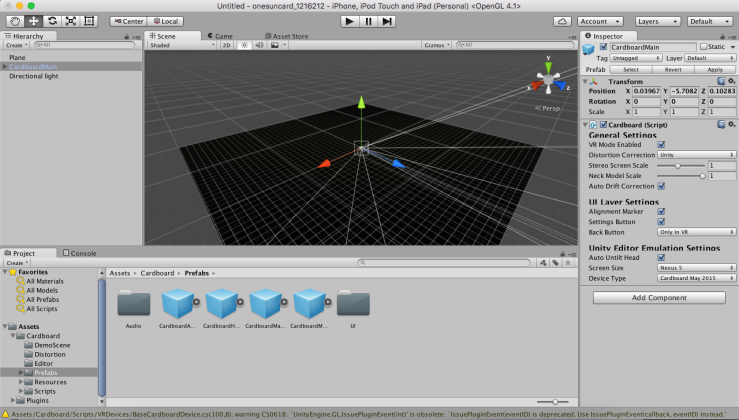
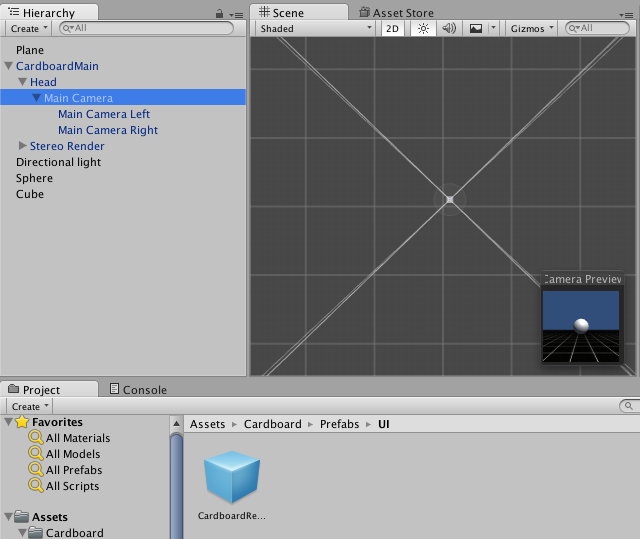
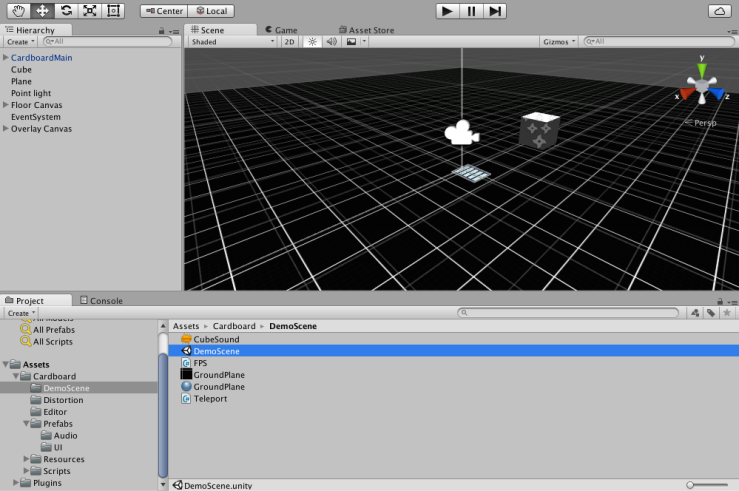
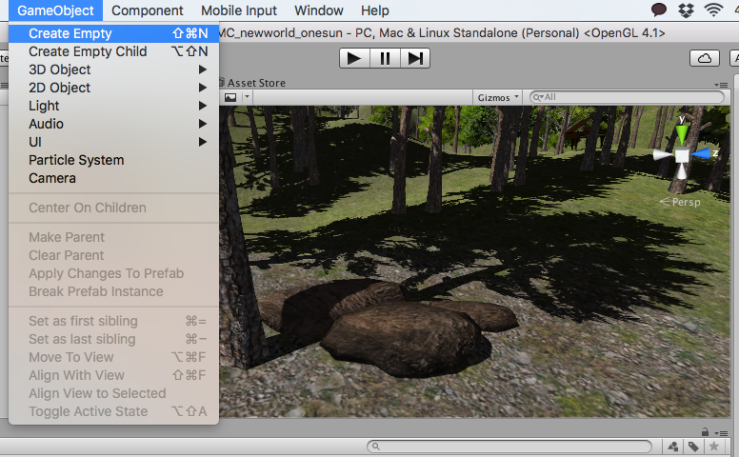
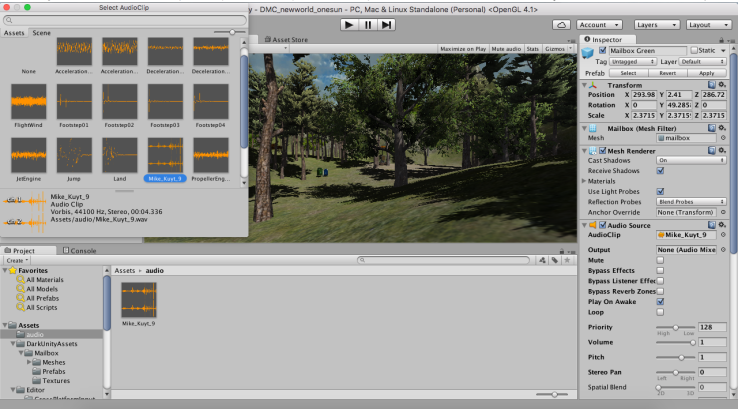
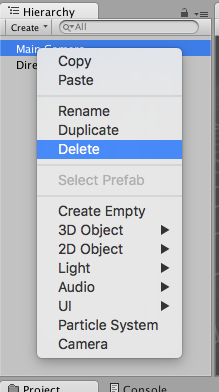
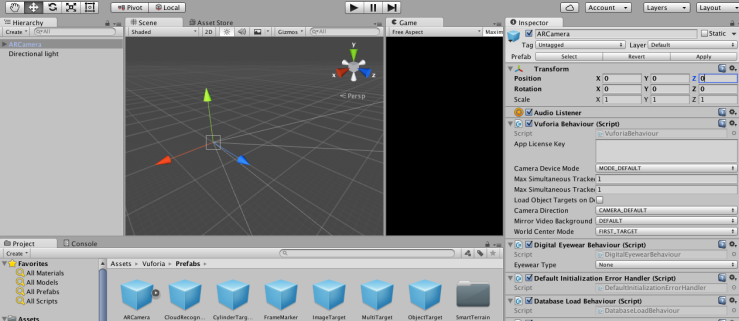
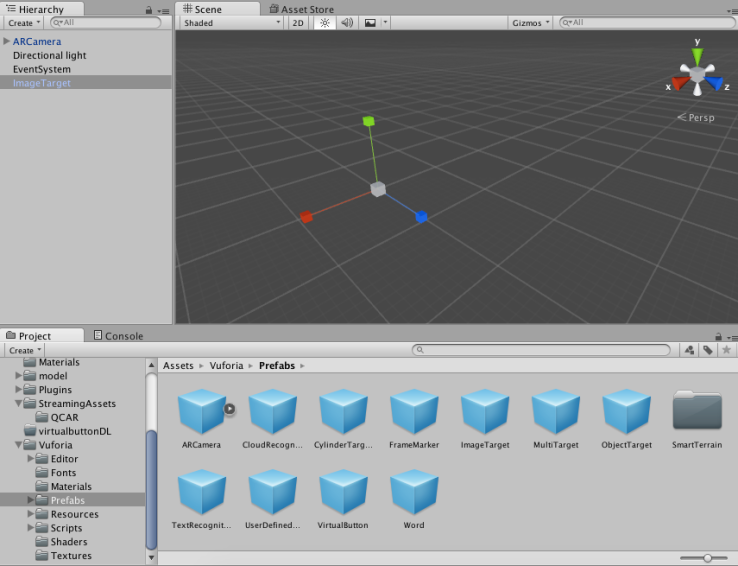
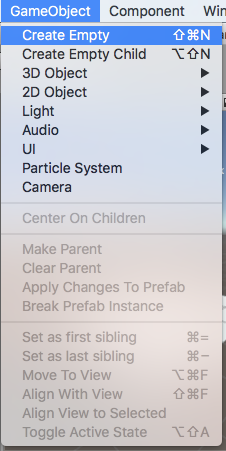
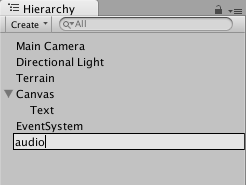
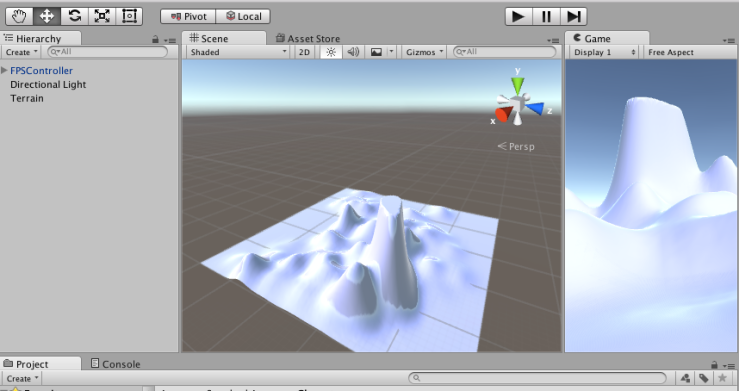
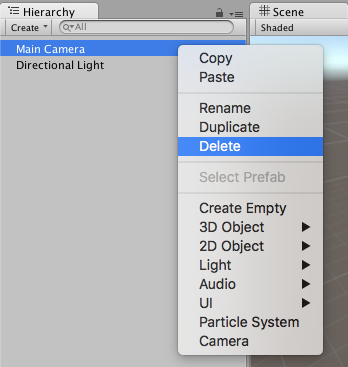
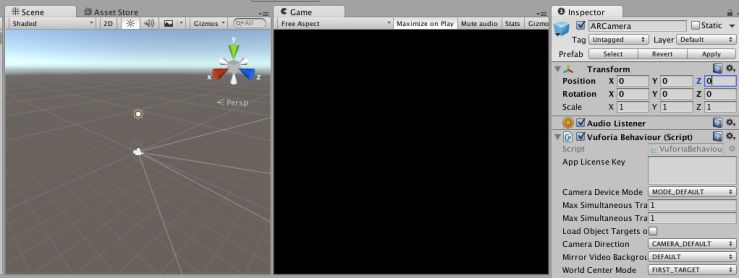
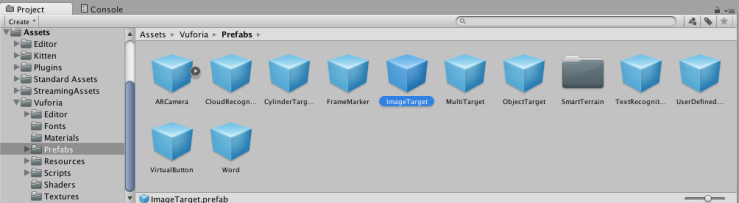
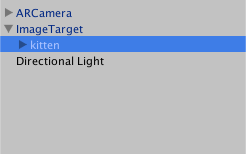
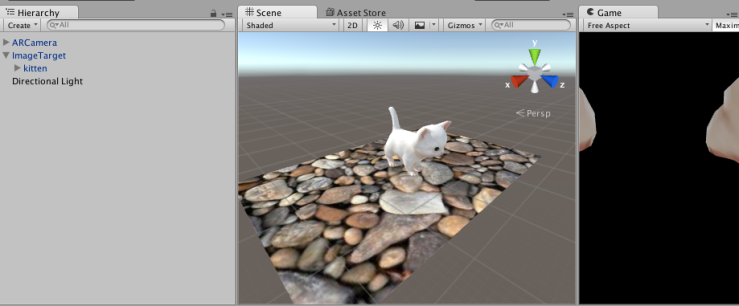
Go to hierarchy and delete the main camera. And drag ‘ARCamera’ into hierarchy. It is in the vuforia prefabs folder. And set its position 0:0:0.

스크린샷 2016-06-13 오전 10.48.31

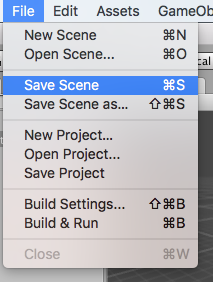
Next, let’s save scene!

스크린샷 2016-06-13 오전 10.48.42

Write the scene name ‘lionflakes’.

스크린샷 2016-06-13 오전 10.49.20

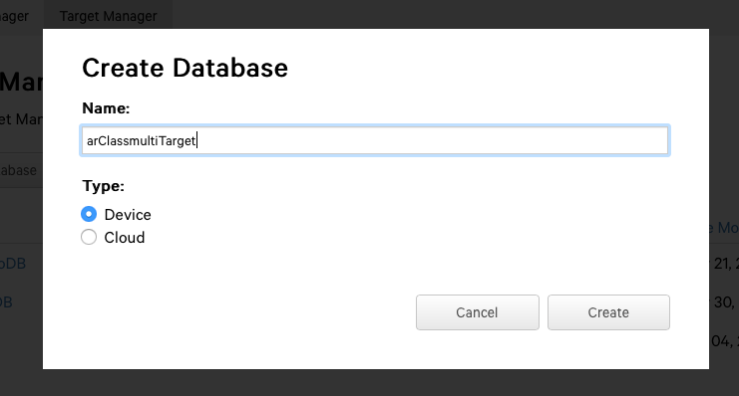
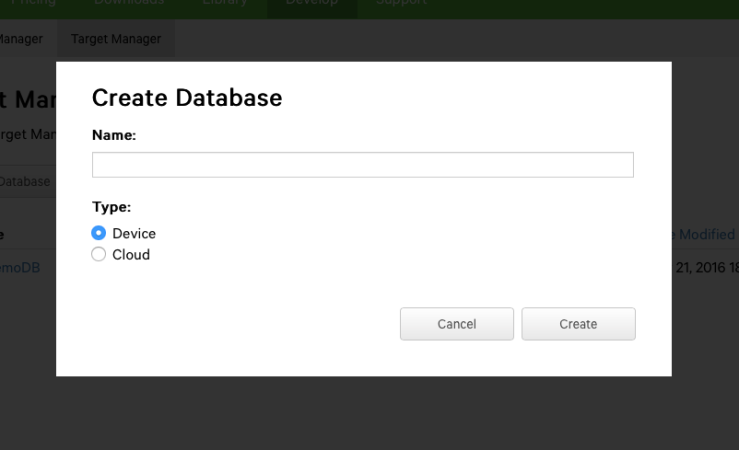
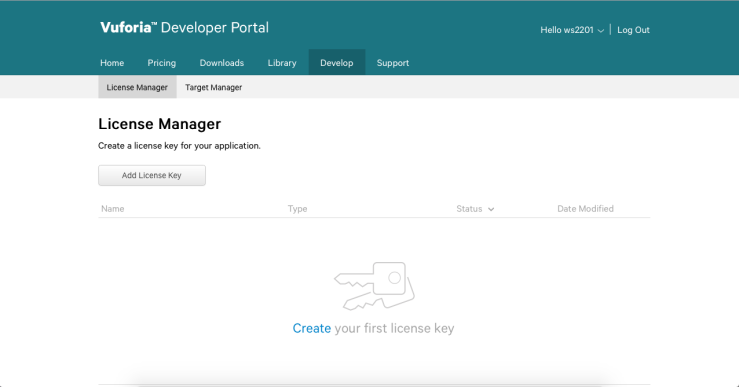
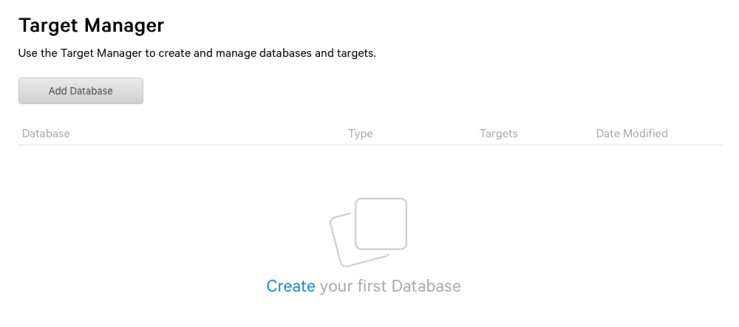
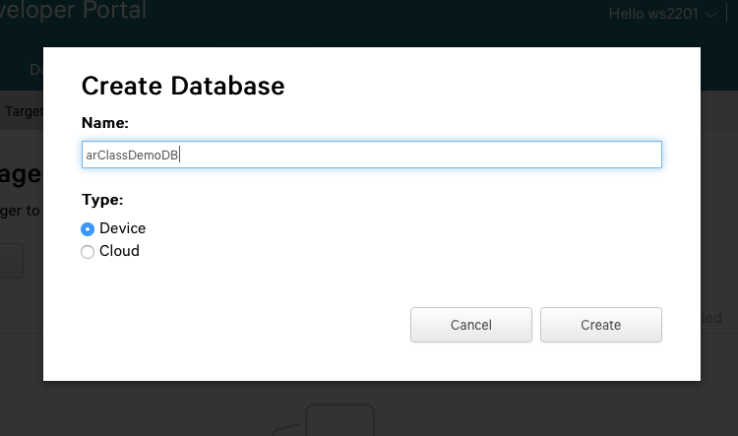
Next, go to Vuforia website. We will create a new database. Set its name ‘arClassmultiTarget’. And select its type ‘Device’.

스크린샷 2016-06-13 오전 10.49.47

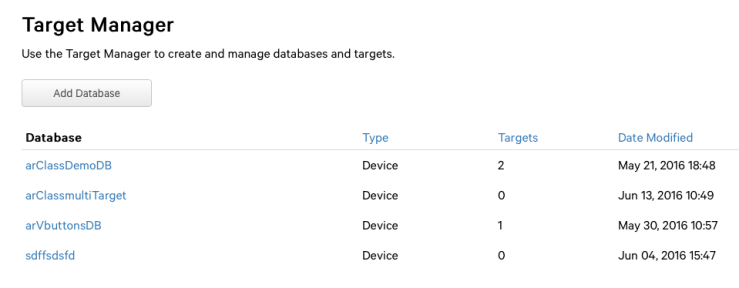
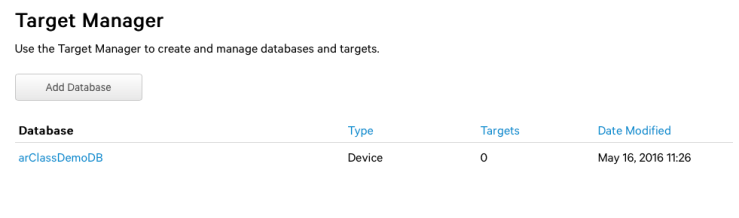
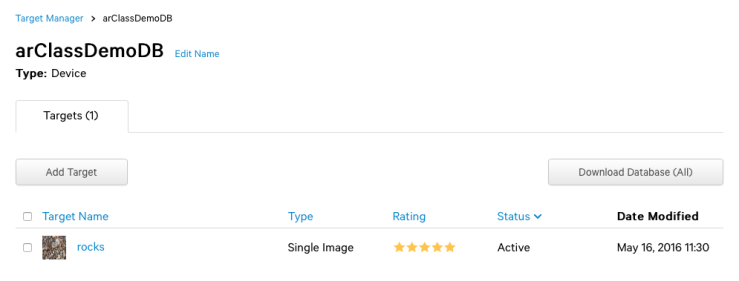
Then new database will be appear in the target manager. Click the one that you made right before.

스크린샷 2016-06-13 오전 10.53.05

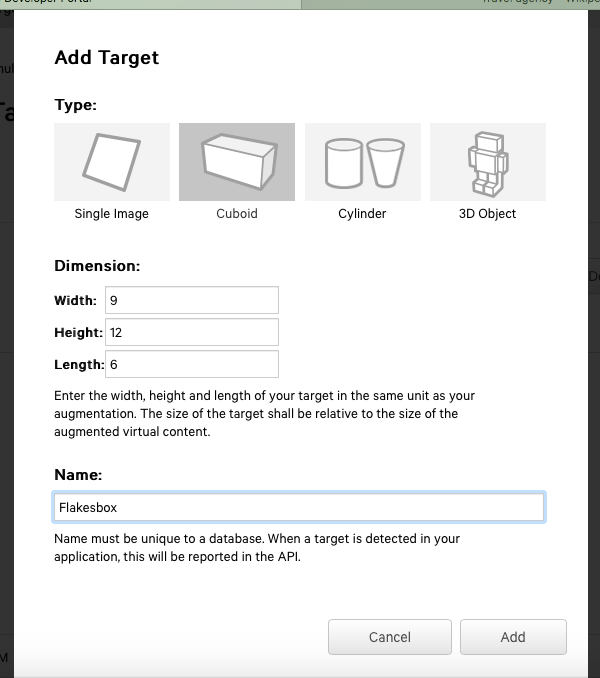
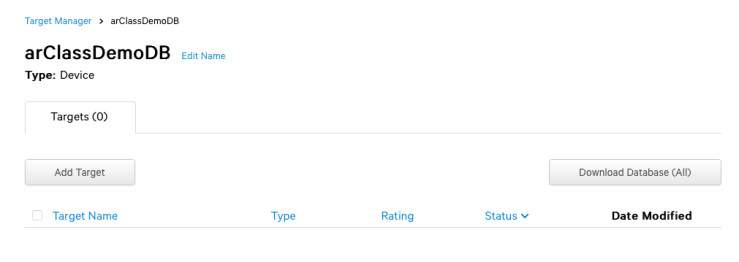
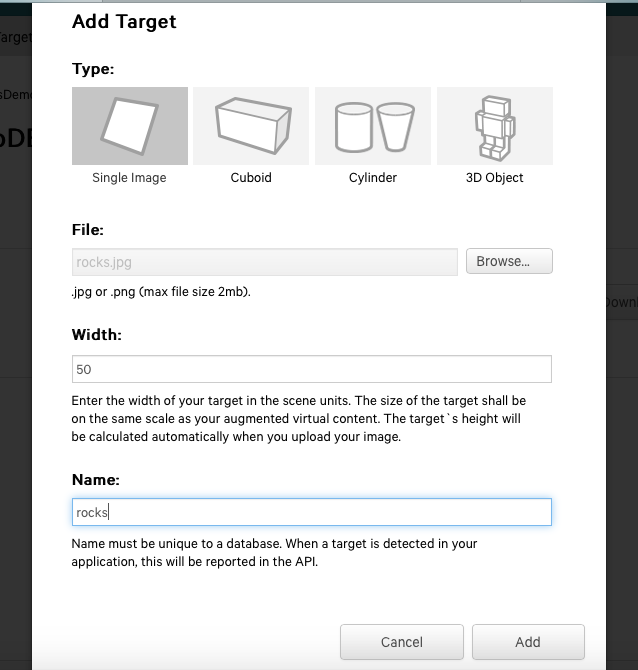
And we will add a new target. This process is little bit different from other ones. Select its type ‘Cuboid’. And set its dimension 9:12:9. Write ‘Flakesbox’ in the name box. And click ‘Add’ button.

스크린샷 2016-06-13 오전 10.56.38

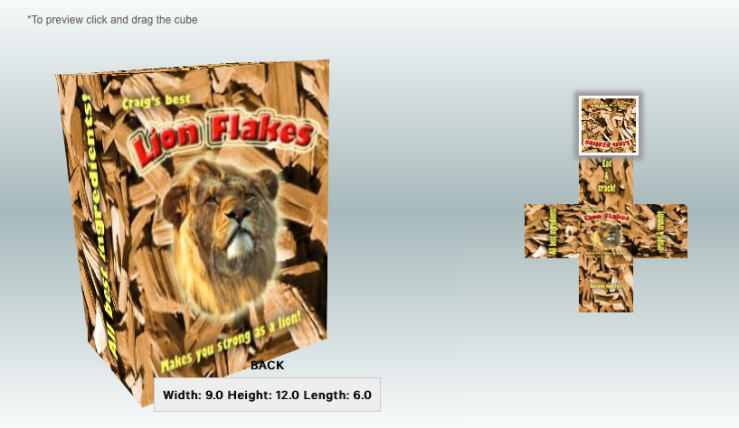
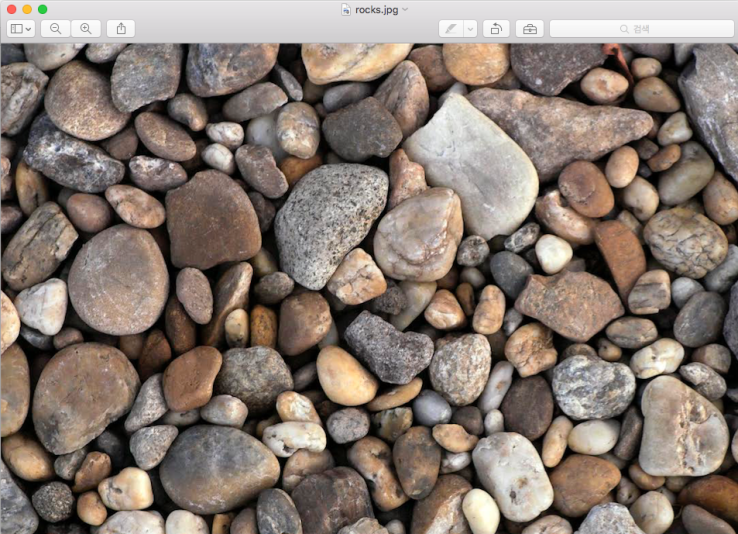
Then you will see the development. Upload images that matches with the development position. The position is written in the file name.

스크린샷 2016-06-13 오전 10.56.52

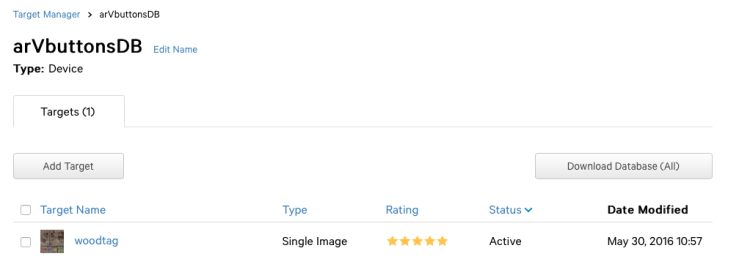
You will see this image when you finally upload the images.

스크린샷 2016-06-13 오전 11.00.32

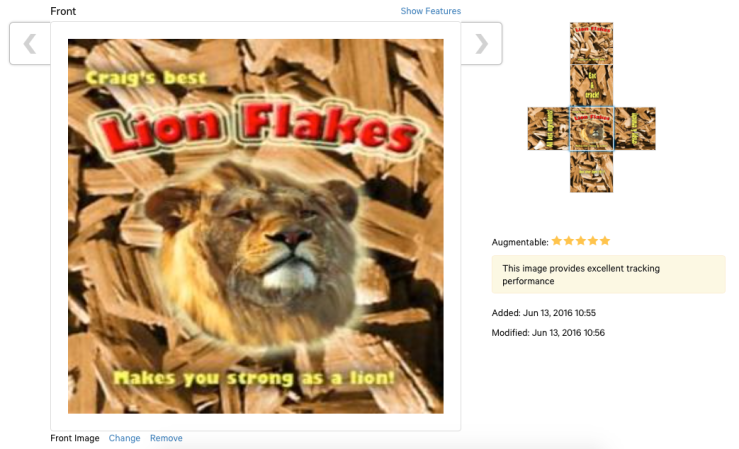
If you double click it, you will see the stars. Many stars means that the camera recognizes your image well.

스크린샷 2016-06-13 오전 11.00.48

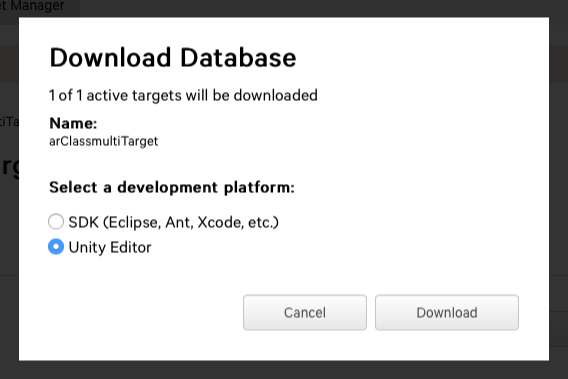
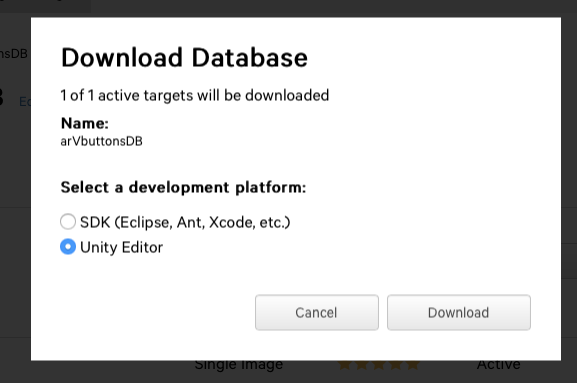
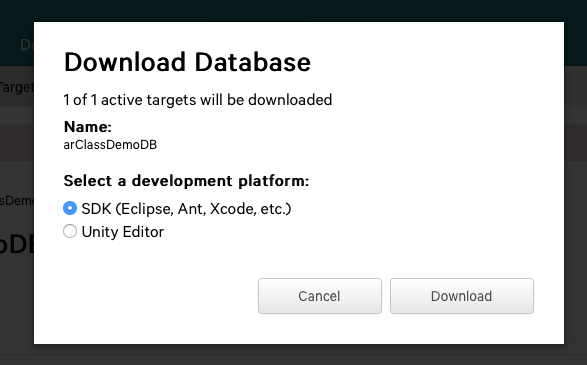
Next, click download database. Select ‘Unity Editor’ in the development platform. Click download button.

스크린샷 2016-06-13 오전 11.03.08

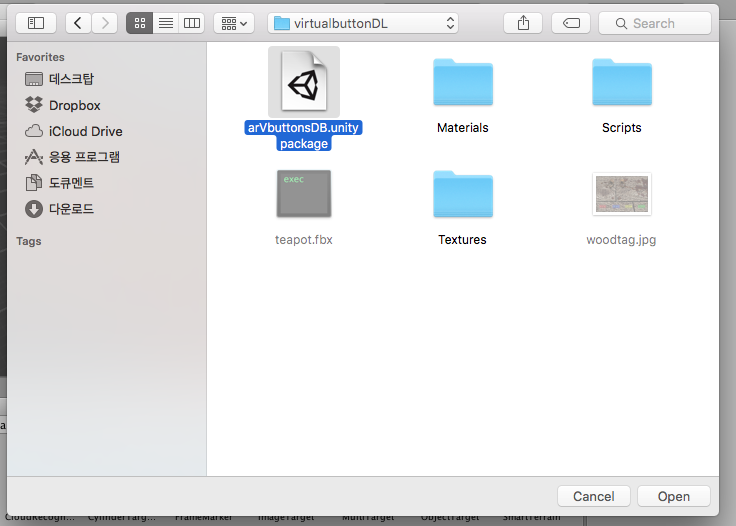
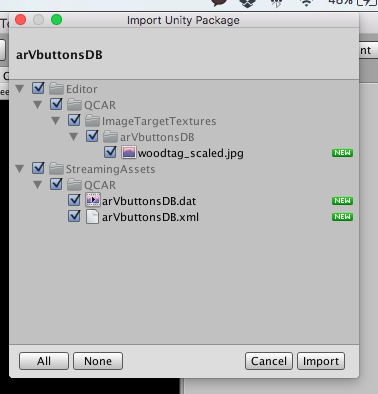
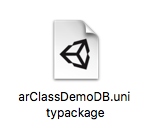
Go to assets > import package > custom package.

스크린샷 2016-06-13 오전 11.03.22

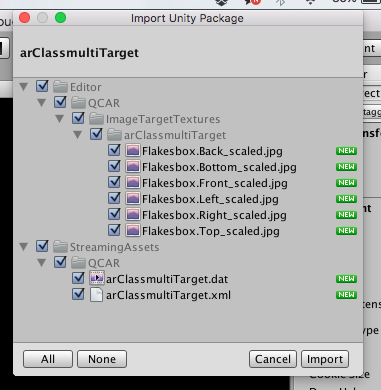
And bring database unity package file.

스크린샷 2016-06-13 오전 11.19.18

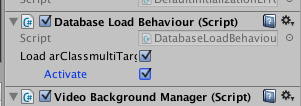
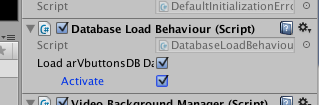
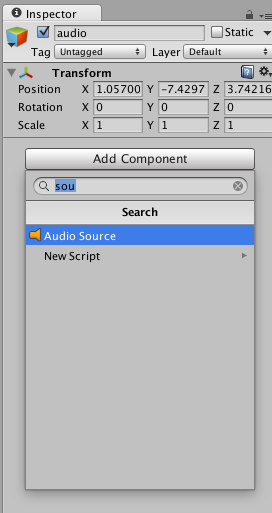
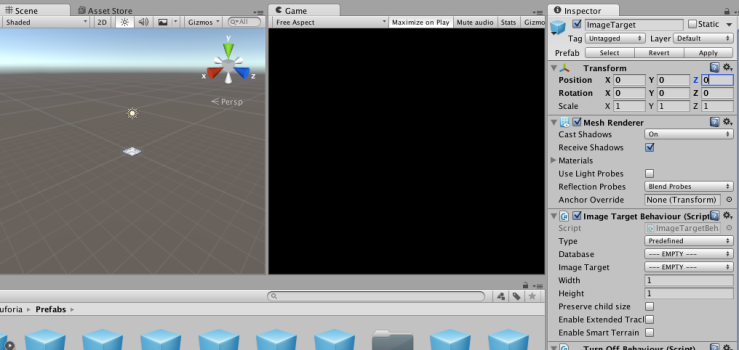
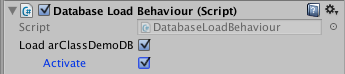
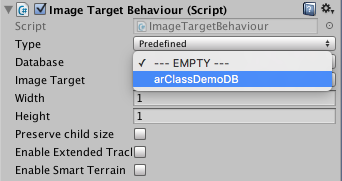
Next, click ARCamera and go to the inspector. Go to Database Load Behavior (Script) and check ‘Load arClass~’. And also check ‘Activate’.

스크린샷 2016-06-13 오전 11.20.31

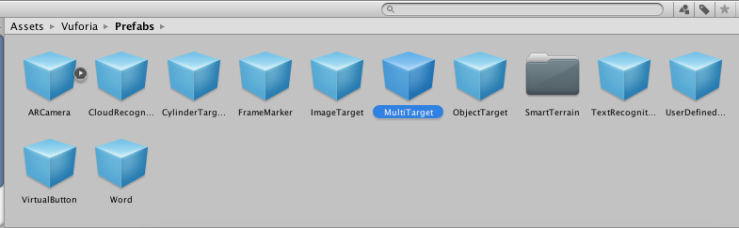
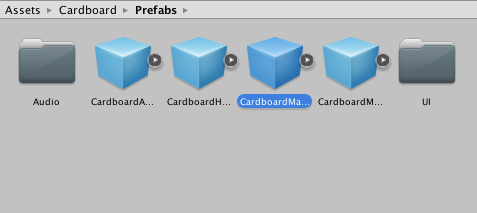
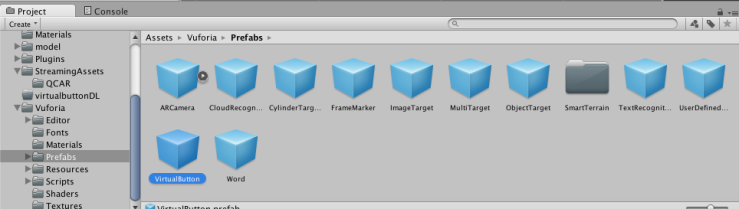
And go to assets > Vuforia > prefabs > MultiTarget. Drag it into the scene.

스크린샷 2016-06-18 오후 10.33.17.png

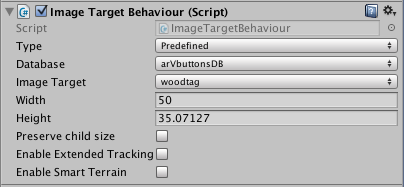
Go to the inspector and find Multi Target Behaviour (Script). Select Database that we download. And also select multi target ‘Flakesbox’.

스크린샷 2016-06-13 오전 11.43.20

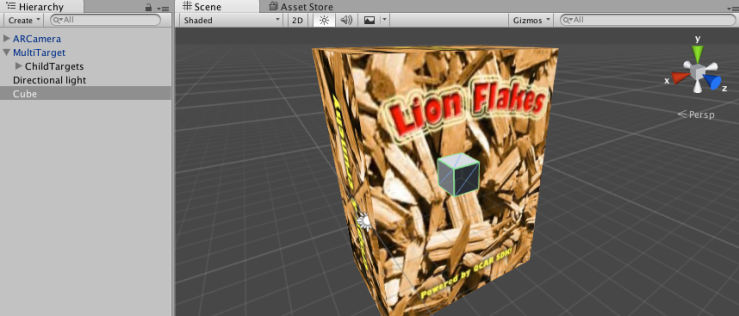
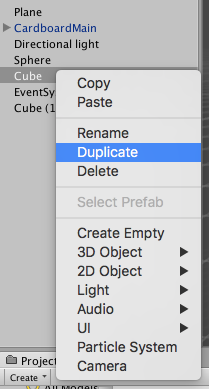
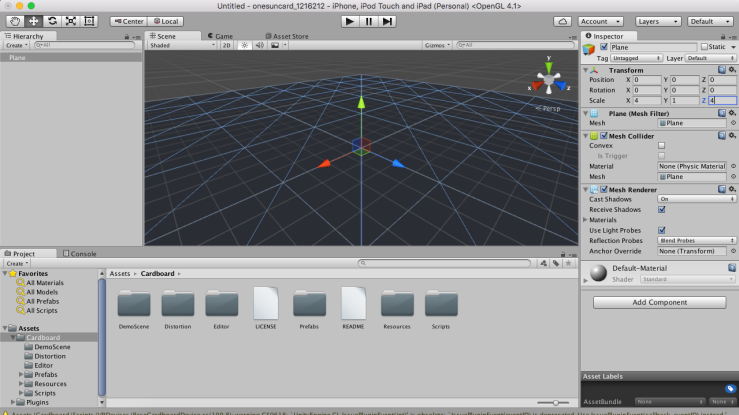
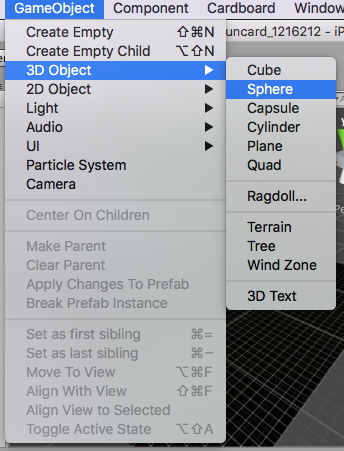
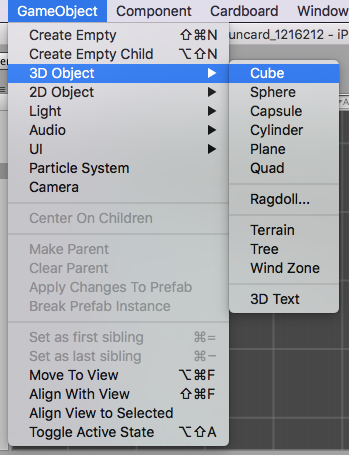
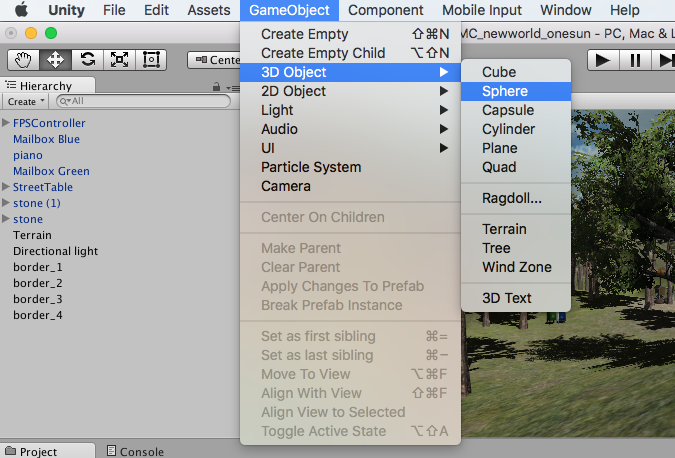
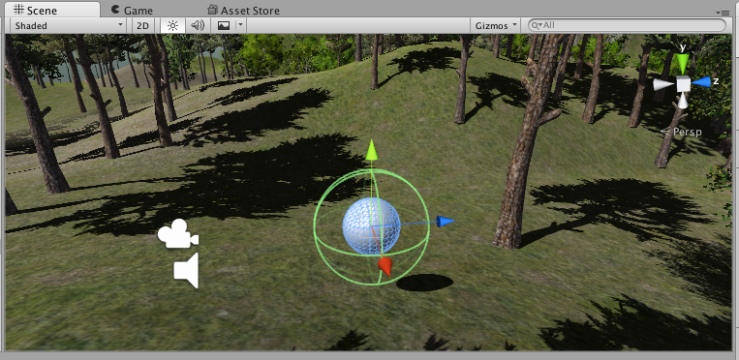
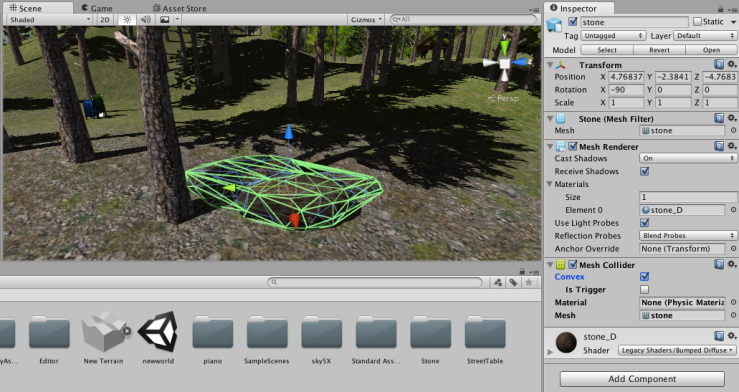
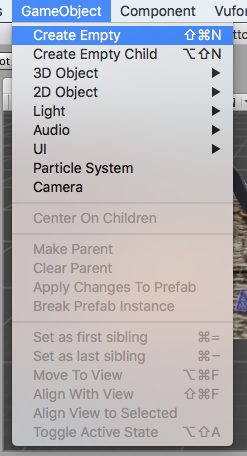
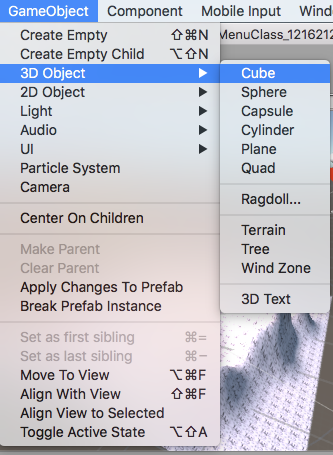
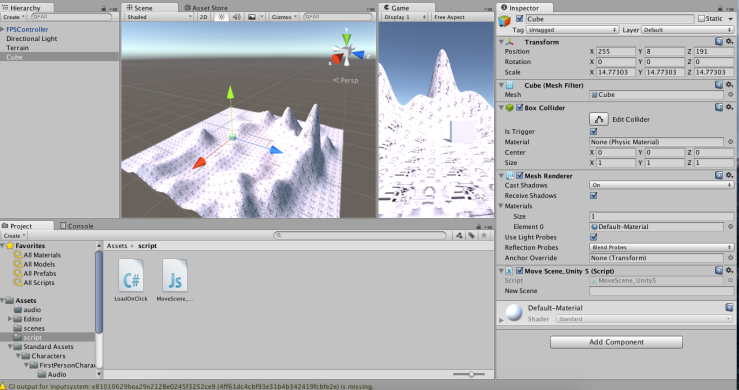
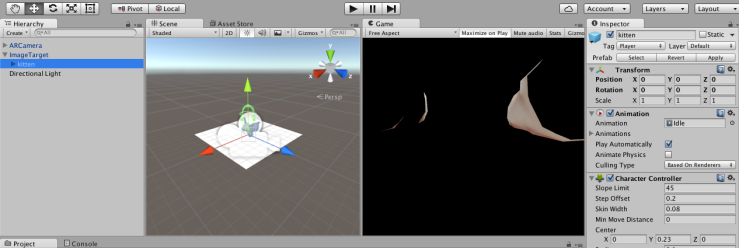
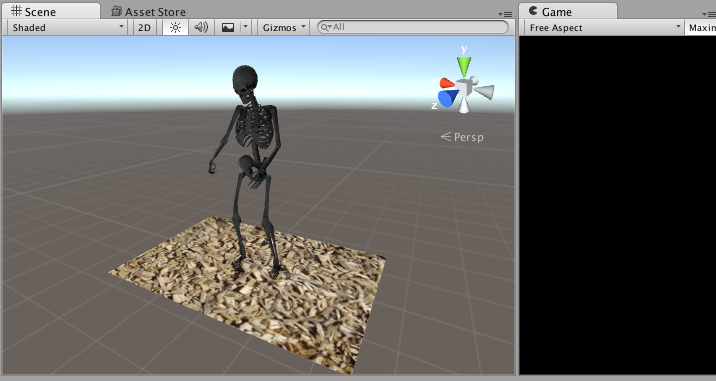
Then lion flakes box will appear in the scene. And make a new cube.

스크린샷 2016-06-13 오전 11.43.33

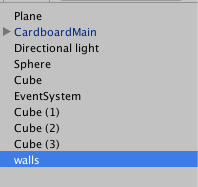
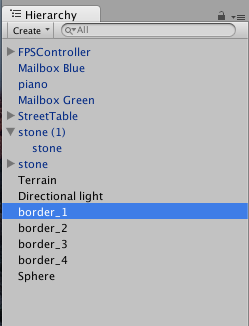
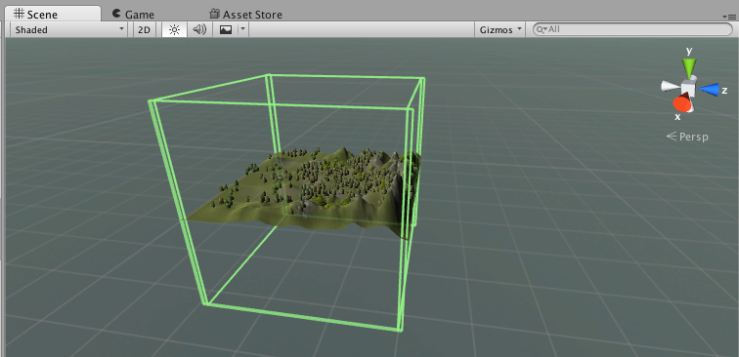
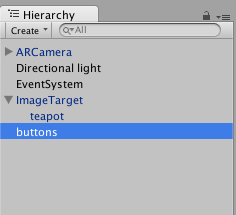
Drag it into MultiTarget and change its name ‘wireframe’.

스크린샷 2016-06-13 오전 11.45.57

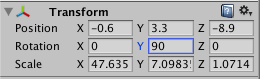
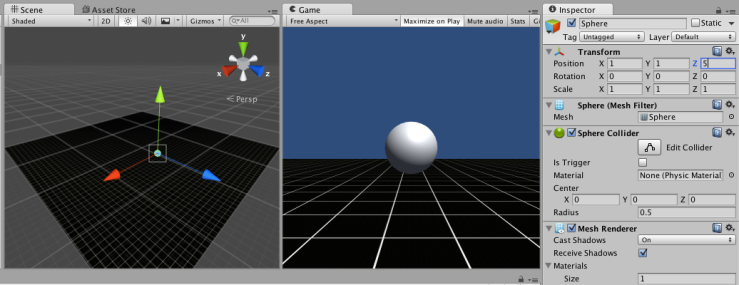
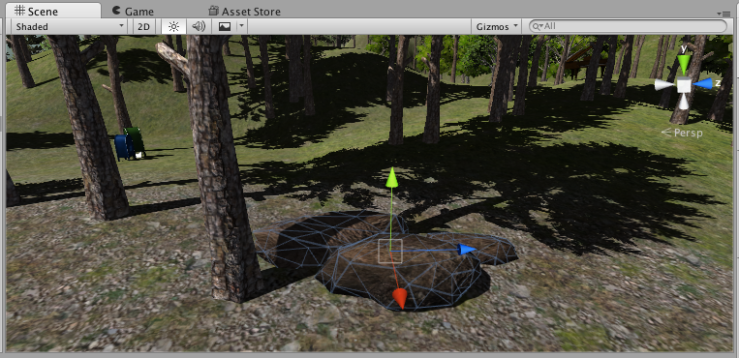
And set its size that fits with lionflakes box.

스크린샷 2016-06-13 오후 12.04.49

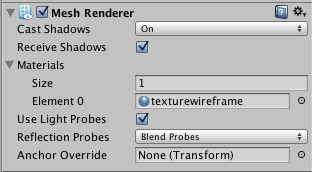
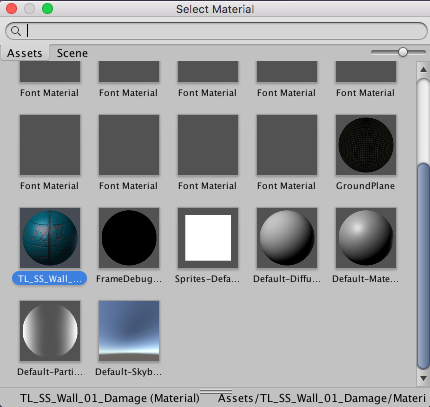
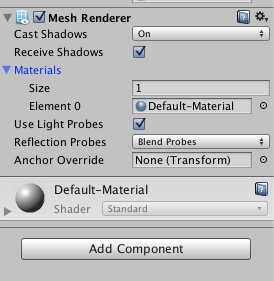
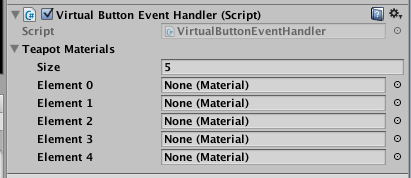
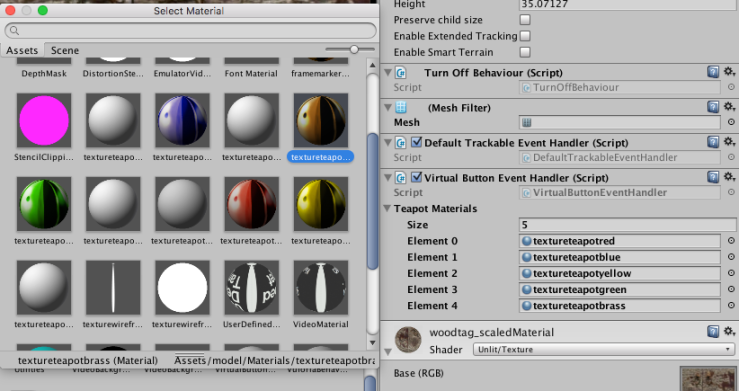
In the inspector, there is a mesh renderer. Select element 0 ‘texturewireframe’.

스크린샷 2016-06-13 오후 12.06.13

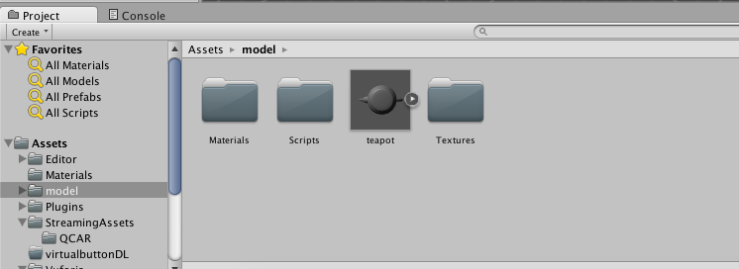
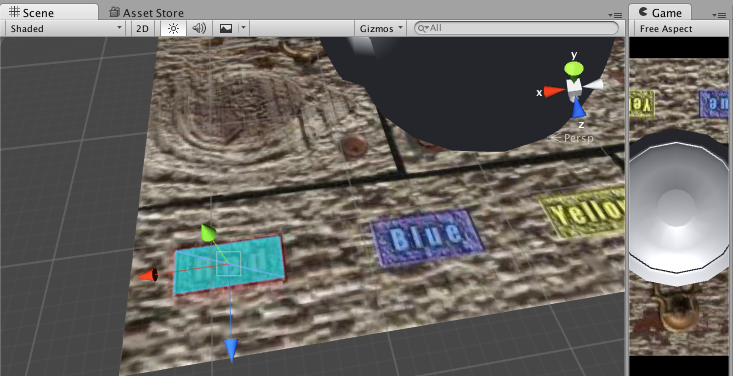
Next, go to assets > models > bowlspoon and drag it into the scene. Put it inside the MultiTarget.

스크린샷 2016-06-13 오후 12.06.35

Select polySurface1 and change its element 0 ‘texturebowlandspoon’.

스크린샷 2016-06-13 오후 12.06.46

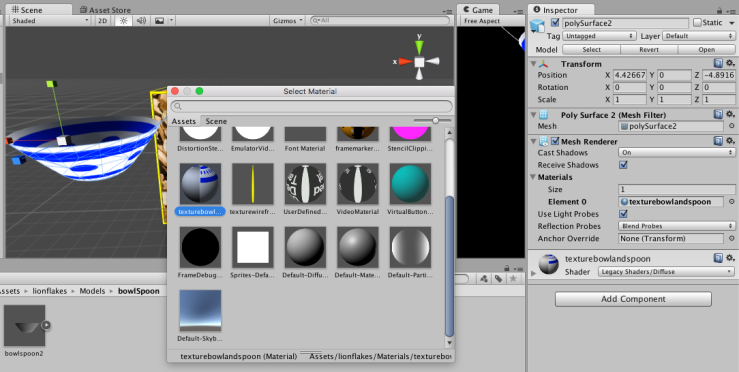
And select polySurface2 and change its texture.

스크린샷 2016-06-13 오후 12.07.04

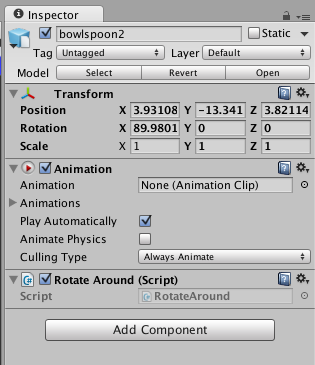
And find the script named ‘Rotate Around (Script)’ and drag it into the inspector of ‘bowlspoon2’.

스크린샷 2016-06-13 오후 12.07.36

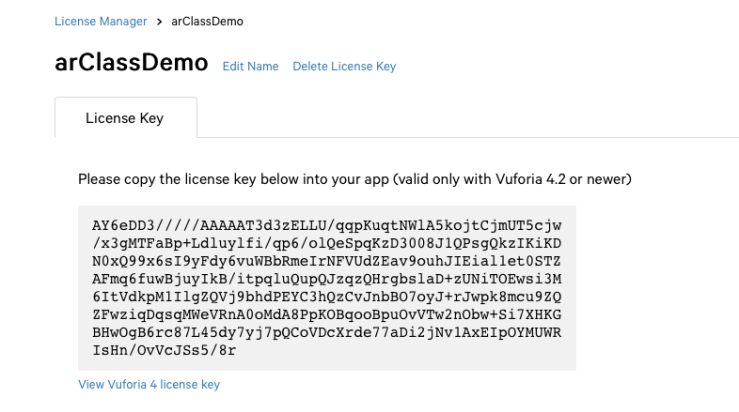
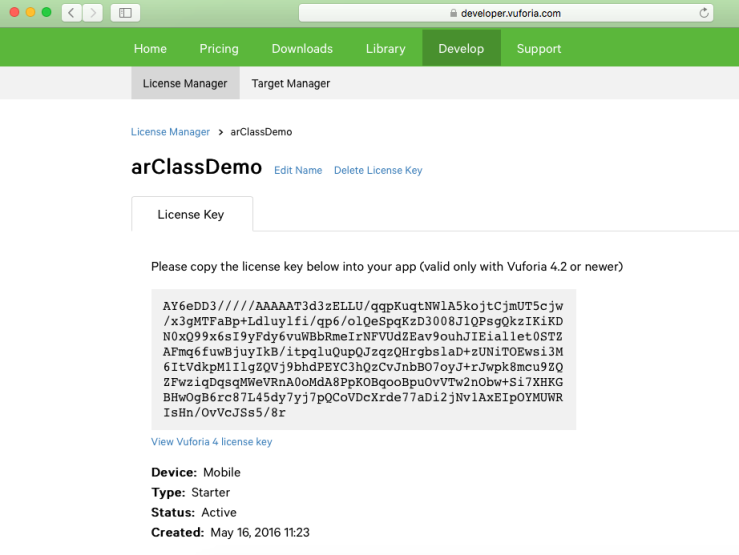
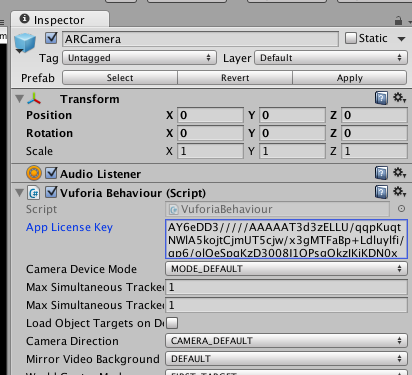
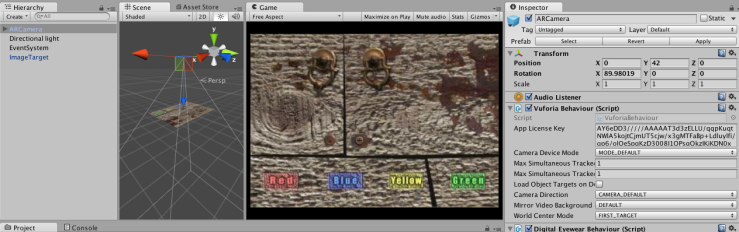
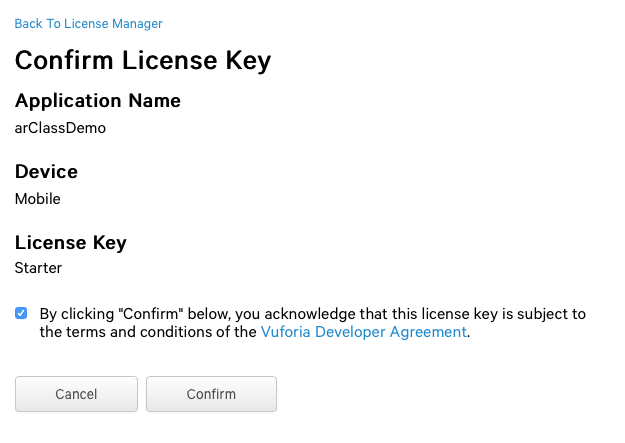
Oops! I forgot to put the license key. Go to Vuforia Website and copy the license key of arClassDemo. You don’t have to make it again.

스크린샷 2016-06-13 오후 12.07.51

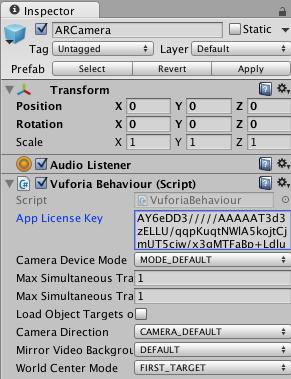
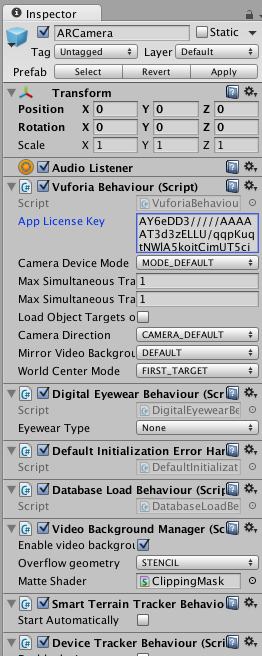
Select ARCamera and go to the inspector. Paste the license key in the Vuforia Behavior App License Key.

스크린샷 2016-06-13 오후 12.08.28

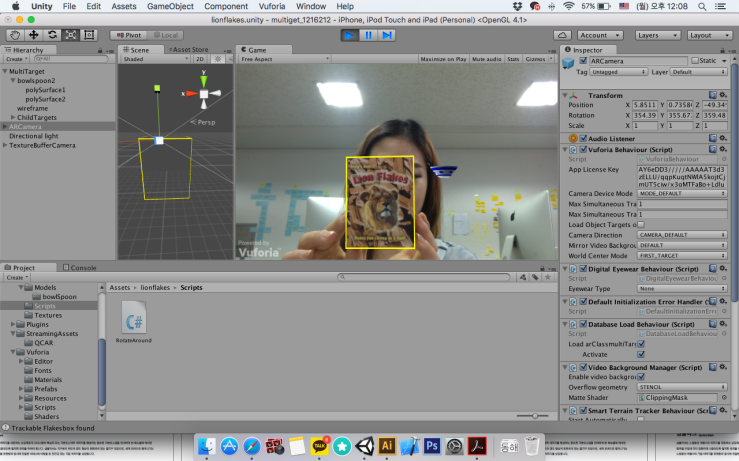
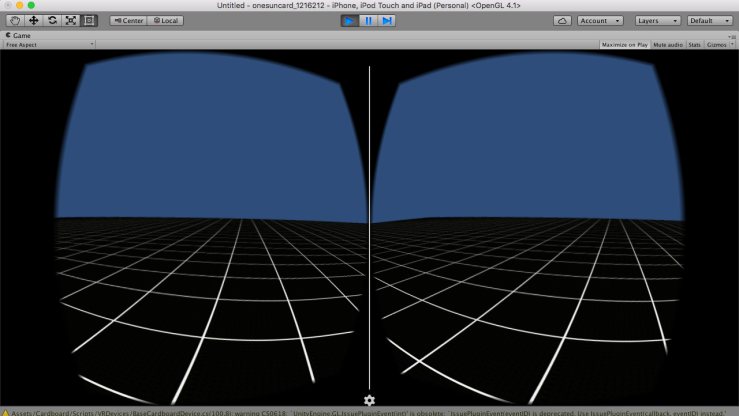
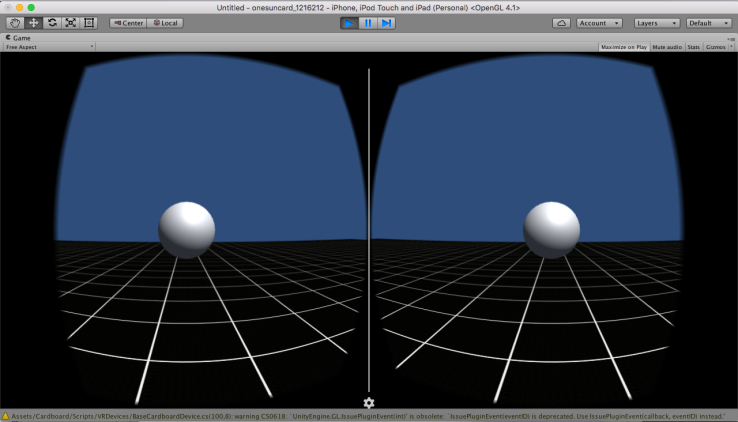
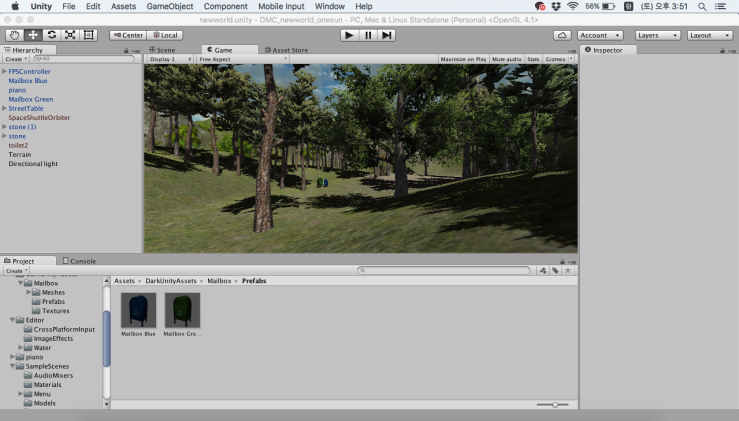
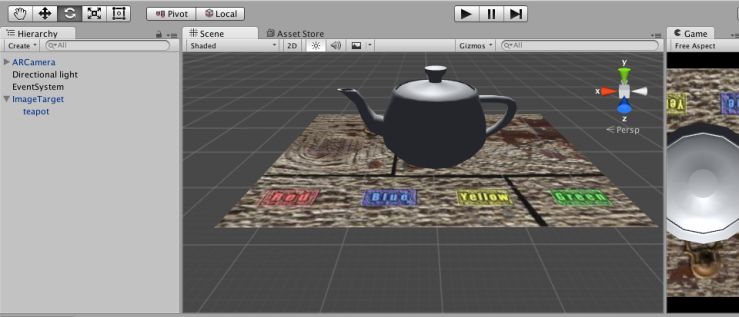
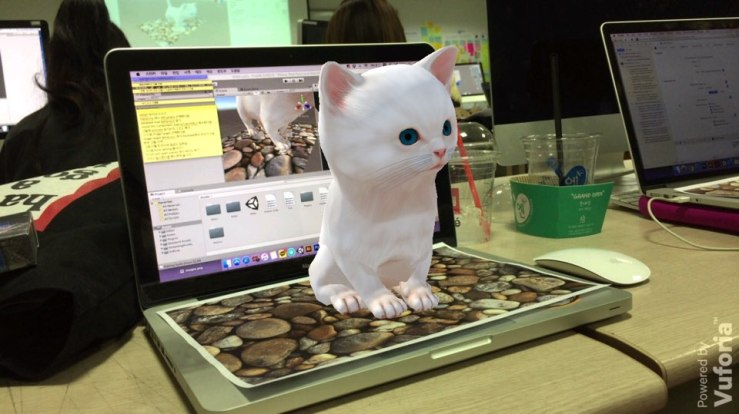
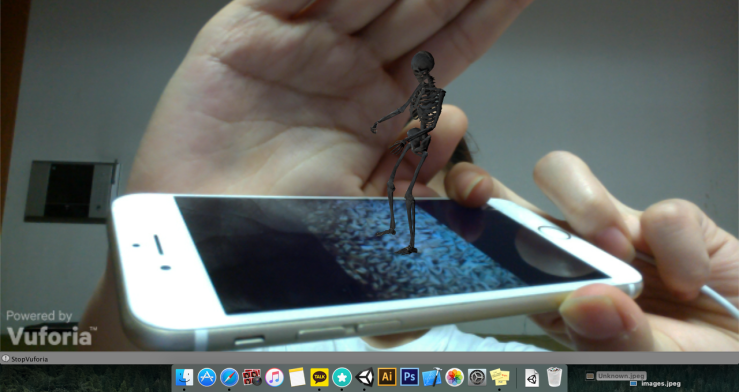
After finishing all these process and click play button, you will see bowlspoon rotating around the lionflakes box! Cool~

0530_ Augmented Reality (2)

Last week, we learned about the advanced part of AR. This time, we will learn how to change the teapot’s color. Here is the process.

스크린샷 2016-05-30 오전 10.29.39

First, download the file named ‘virtualbuttonDL’ in class website.

스크린샷 2016-05-30 오전 10.31.02

Make a new project in Unity.

스크린샷 2016-05-30 오전 10.32.40

Next, go to build settings and change its platform into iOS. And click ‘Player settings’.

스크린샷 2016-05-30 오전 10.34.05

In player settings, un-check ‘portrait’ and ‘portrait upside down’. And change company name and product name. My bundle identifier is ‘com.onesun.virtualbuttons_class_1216212’.

스크린샷 2016-05-30 오전 10.37.36

And bring Vuforia unity package that we downloaded last time.

스크린샷 2016-05-30 오전 10.48.50

Delete the main camera,

스크린샷 2016-05-30 오전 10.49.41

And drag ‘ARCamera’ into the scene. Set its position 0:0:0.

스크린샷 2016-05-30 오전 10.52.27

Go to Vuforia homepage and copy the license key that we add last time.

스크린샷 2016-05-30 오전 10.52.40

And paste it in ‘App License key’ in ‘Vuforia Behavior’.

스크린샷 2016-05-30 오전 10.54.15

Go back to Vuforia homepage and go to target manager. In here, we will create another database. Write the name you want, and select ‘Device’. And click ‘create’.

Click the database you added right before. And click ‘add target’.

스크린샷 2016-06-04 오후 3.47.34.png

You will see this pop-up screen when you click it.


Bring ‘woodtag.jpg’ in the folder that you downloaded in the class website. Select ‘single image’ and set the width 50.

스크린샷 2016-05-30 오전 10.57.50

Then the target will appear in the screen. Click ‘Download Database’.

스크린샷 2016-05-30 오전 10.58.08

Then this pop-up screen will appear. Select Unity editor in the platform and click download.

스크린샷 2016-05-30 오전 10.59.58

Then the unity package will be downloaded on your computer.

스크린샷 2016-05-30 오전 11.00.05

Import that unity package in Unity.

스크린샷 2016-05-30 오전 11.42.53

Make a new folder named ‘model’ inside the assets folder, and put all the files that you downloaded in the class website.

스크린샷 2016-05-30 오전 11.55.57

Next, go to UI > Event system.

스크린샷 2016-05-30 오전 11.57.23

Drag ‘imagetarget’ into the scene. It is in ‘prefabs’ folder. And set its position 0:0:0.

스크린샷 2016-05-30 오전 11.59.25

In image target behavior, there is ‘database’. Select it that you downloaded right before.

스크린샷 2016-05-30 오후 12.02.11

Next, In ‘ARCamera’ inspector, rotate x position 90 degree and set y position in 42. Then the tag will appear well in the game view.

스크린샷 2016-05-30 오후 12.04.03

Next, add ‘virtual button event handler’ in the image target inspector.

스크린샷 2016-05-30 오후 12.07.05

When you write ‘5’ in the teapot material size,

스크린샷 2016-05-30 오후 12.08.07

5 element will appear in there.

스크린샷 2016-05-30 오후 12.08.50

Select its material in regular sequence. It must be matched with the picture color’s sequence.

스크린샷 2016-05-30 오후 12.13.29

Next, drag the model named ‘teapot’ into the scene. It must be placed inside the image target. And set its size 0:0:0.

스크린샷 2016-05-30 오후 12.16.48

Next, go to the ‘ARCamera’ inspector and check ‘Load arVbuttons DB Database’. And also check ‘activate’.

스크린샷 2016-05-30 오후 12.20.59

Then we can see the pot inside camera. And rotate the image target so that we can easily see its buttons.

스크린샷 2016-05-30 오후 12.22.49

Go to Gameobject > create empty.

스크린샷 2016-05-30 오후 12.22.59

And change its name ‘buttons’.

스크린샷 2016-05-30 오후 12.23.33

In assets > vuforia > prefabs, there is a VirtualButton. Drag it into the ‘buttons’ in Hierarchy.

스크린샷 2016-05-30 오후 12.27.02

Drag ‘button’ folder into the image target. ‘Button’ folder will be a child of image target. And set the position and size that fits with the first button.

스크린샷 2016-05-30 오후 12.29.26

Next, add ‘virtual button behavior’ in the inspector.

스크린샷 2016-05-30 오후 12.35.25

Make 4 more buttons and pull out in the image target. You can’t move it when you don’t pull out in it.

스크린샷 2016-05-30 오후 12.37.11

Set its positions that fits in its buttons. If you done with setting its position and size,  drag it into image target again.

스크린샷 2016-05-30 오후 12.39.39

Select button and change its name same with the color. Set the name of another 4 buttons also.

스크린샷 2016-05-30 오후 12.45.19

Then the pot will appear and also change its color when you click play button. Great!

0523_Making a menu in Unity

Last time, we learned how to add a menu in Unity.

스크린샷 2016-05-23 오전 10.25.18

First, create a new project.

스크린샷 2016-05-23 오전 10.26.09

스크린샷 2016-05-23 오전 10.26.50

스크린샷 2016-05-23 오전 10.27.16
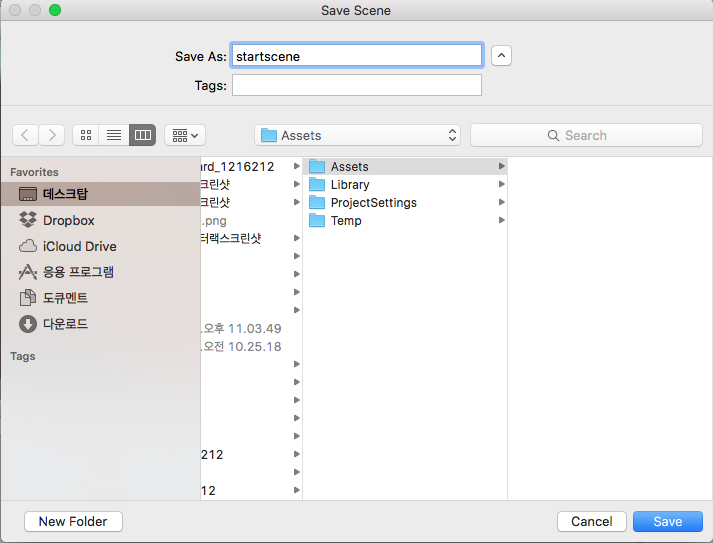
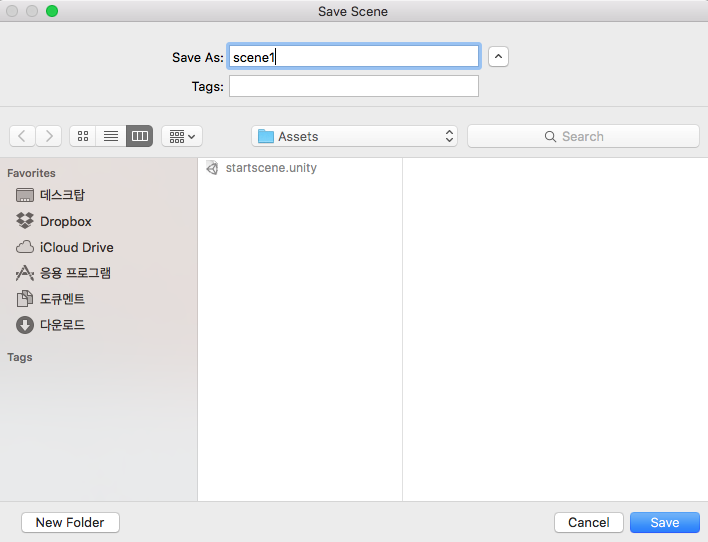
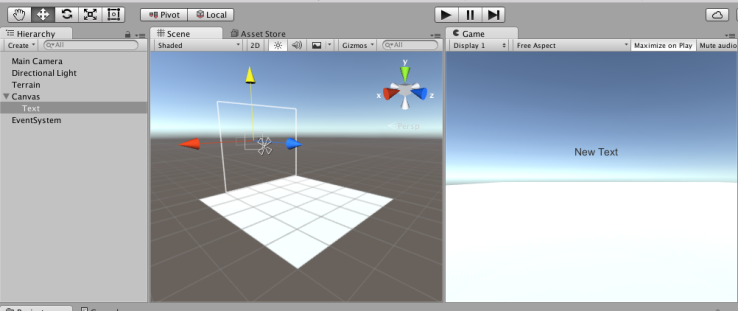
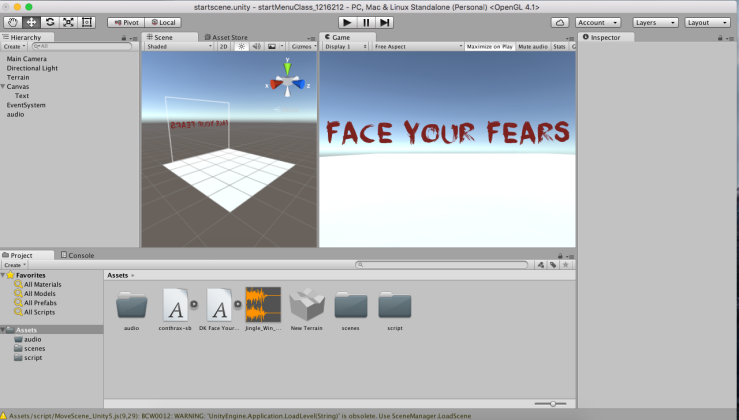
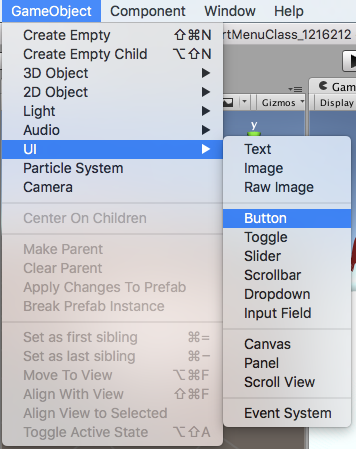
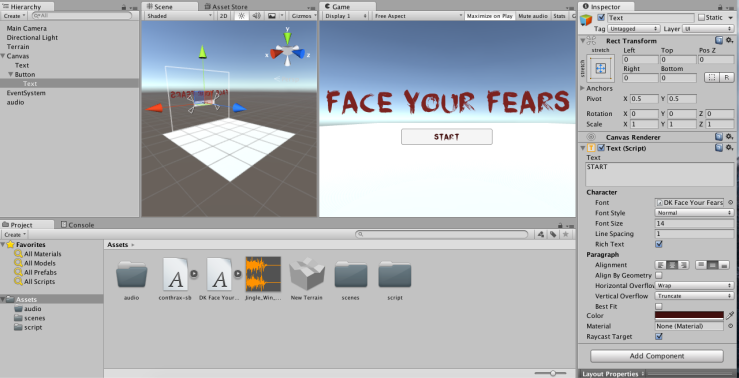
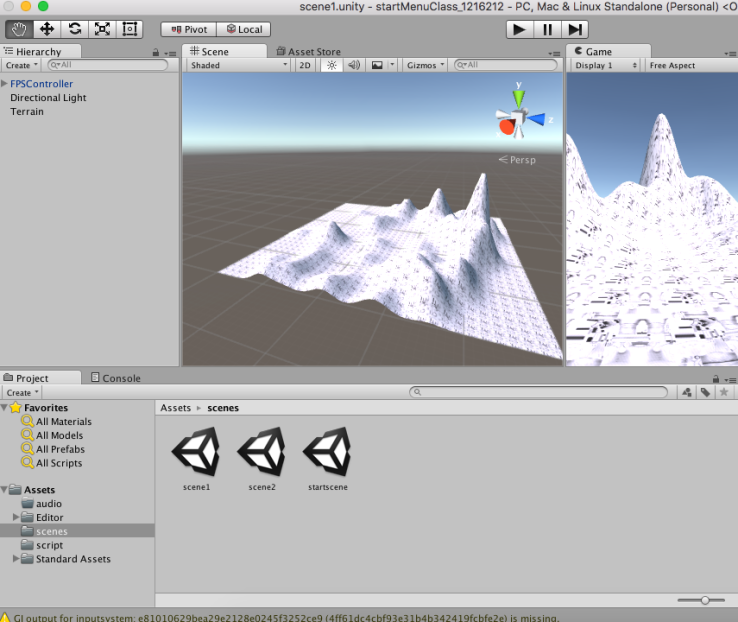
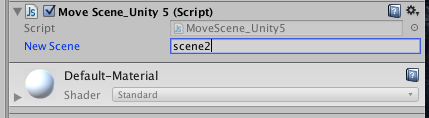
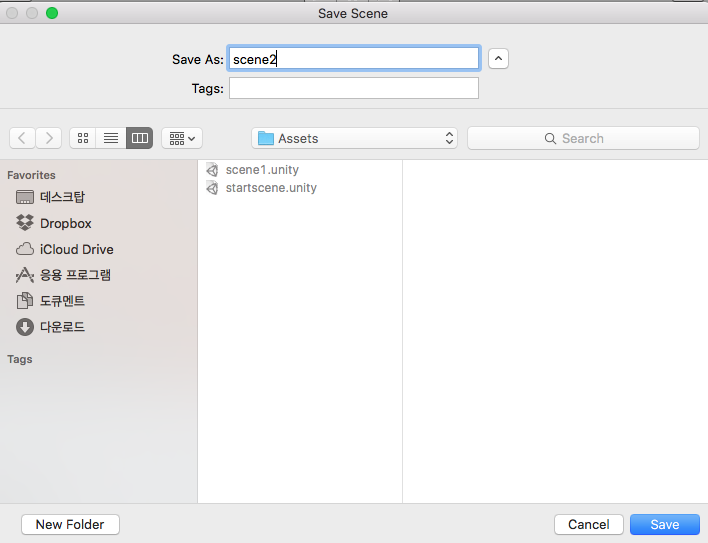
And we will make three scenes. Name each scene ‘startscene’, ‘scene1’, ‘scene2’.

스크린샷 2016-05-23 오전 10.27.38

Make a new folder named ‘scenes’ and drag three scenes in here.

스크린샷 2016-05-23 오전 10.30.45

And create a new folder named ‘scripts’ and drag all the scripts file in here. You can download scripts file in class website.

스크린샷 2016-05-23 오전 10.35.38

Next, make a new terrain. You can customize it, but this time, we will go simple.

Now we will go into the UI. We can make not only a game, but also a great app. We will add a text.

스크린샷 2016-05-23 오전 10.39.42

Go to UI > Text.

스크린샷 2016-05-23 오전 10.40.57

You will automatically get canvas when you add a text. And you can see the text in the game view.

스크린샷 2016-05-23 오전 10.48.55

Go to inspector and change the text you want. You can customize your own text by changing font and its size. But text disappear when you make text bigger.

스크린샷 2016-05-23 오전 10.57.41

In here, you can set any size by selecting ‘overflow’.

스크린샷 2016-05-23 오전 11.12.47

Next, make a new folder named ‘audio’ in the assets folder.

스크린샷 2016-05-23 오전 11.02.51

Next, go to gameobject > create empty.

스크린샷 2016-05-23 오전 11.03.00

And change its name into ‘audio’.

스크린샷 2016-05-23 오전 11.03.09

Go to hierarchy and add an audio source.

Next, we will make a button.

스크린샷 2016-05-23 오전 11.31.13

Go to UI > Button.

스크린샷 2016-05-23 오전 11.33.29

There’s a text inside a button folder. Change its name ‘start’.

스크린샷 2016-05-23 오전 11.43.17

In the inspector, there’s a spuit icon next to the normal color.

스크린샷 2016-05-23 오전 11.34.59

If you set Alpha 0, boundary line will gone.

스크린샷 2016-05-23 오전 11.39.09

Next, click ‘LoadOnClick’ in the script folder.

스크린샷 2016-05-23 오전 11.39.50

Then Monodevelop will automatically activate. You can fix the code in here if you want.

스크린샷 2016-05-23 오전 11.46.54

Drag ‘LoadOnClick’ into the inspector of canvas. Next, click ‘+’ button placed in the right under side of it. We used this in ray caster system.

스크린샷 2016-05-23 오전 11.48.04

스크린샷 2016-05-23 오전 11.48.30

And select loadscene in the pulldown menu.

스크린샷 2016-05-23 오전 11.49.41

And change the number 0 to 1.

스크린샷 2016-05-23 오전 11.50.46

Next, save scene and go to the build settings.

스크린샷 2016-05-23 오전 11.51.42

Drag all scenes into the build settings.

스크린샷 2016-05-23 오전 11.54.29

Next, go to assets > import package > characters.

스크린샷 2016-05-23 오후 12.04.00

Go to scene 1 and make a mini scene. Make terrain and delete camera, drag FPS controller.

Then start scene will change into scene 1 when you click the button.

Next, go to scene 2.

스크린샷 2016-05-23 오후 12.06.19

Set the terrain same with scene 1.

And go to scene 1 again.

스크린샷 2016-05-23 오후 12.07.28

Select FPSController and go to the inspector. You can find ‘tag’ in there.

스크린샷 2016-05-23 오후 12.18.10

Select ‘Player’ in there.

스크린샷 2016-05-23 오후 12.09.03

Next, go to 3d object > cube. Set the appropriate size in your scene.

스크린샷 2016-05-23 오후 12.11.21

And go to the inspector. Check ‘is trigger’ in box collider.

스크린샷 2016-05-23 오후 12.12.53

Select ‘movescene’ in the scripts folder and drag it into the inspector of cube.

스크린샷 2016-05-23 오후 12.14.06

And write ‘scene2’ in the new scene in ‘Move scene’.

Then scene will change when you go through the cube. Amazing!


0516_Starting Augmented Reality Project

Last time, we started learning about Augmented Reality. Augmented reality, also known as AR, is a type of virtual reality that aims to duplicate the world’s environment in a computer or mobile phone. Today, AR is used in entertainment, military training, design, robotics,  manufacturing and other industries.

In class, Professor Todd told us about a website named ‘Vuforia’. Vuforia is an Augmented Reality Software Development Kit (SDK) for mobile devices that enables the creation of AR applications. They provides SDK to build applications for mobile devices. It also can be built with Unity. Let’s make a simple project using Vuforia SDK in Unity.

스크린샷 2016-05-16 오전 10.47.06

First, go to Vuforia website (Vuforia.com). You must register to download the file. After register, log in and go to ‘downloads’. We have to download the file which can be used in Unity, so download the file named ‘Download for Unity’.

스크린샷 2016-05-16 오전 10.51.32

And you can get this image by typing https://db.tt/mXvO4uLj in website address bar.

스크린샷 2016-05-16 오전 10.56.31

Go to Unity and create a new file.

스크린샷 2016-05-16 오전 10.58.16

Go to File > Build Settings.

스크린샷 2016-05-16 오전 10.58.26

In Build settings, select iOS in platform and click ‘Switch Platform’.

스크린샷 2016-05-16 오전 10.59.06

Next, go to Import Package > Custom Package.

스크린샷 2016-05-16 오전 10.59.43

Select unity package file that we downloaded in Vuforia.

스크린샷 2016-05-16 오전 11.01.21

Then you can see this screen and assets.

스크린샷 2016-05-16 오전 11.01.58

Let’s download 3d model in Asset store. I chose ‘Cute Kitten’.

스크린샷 2016-05-16 오전 11.16.56

Go to Hierarchy and delete ‘Main Camera’.

스크린샷 2016-05-16 오전 11.17.34

You can see a prefab named ‘ARCamera’ in assets > prefabs. Drag it to the scene.

스크린샷 2016-05-16 오전 11.19.06

And set its position in 0:0:0.

스크린샷 2016-05-16 오전 11.20.50

Go to Vuforia website again. You can find License Manager in ‘Develop’. And click ‘Add License Key’. Without license key, your project will not work.

스크린샷 2016-05-21 오후 8.18.00.png

Write ‘arClassDemo’ in name field and select ‘mobile’ in device. And select ‘starter – No charge’ in License key. Click Next.

스크린샷 2016-05-16 오전 11.23.02

And you will see this pop-up screen. Check agreements of terms and condition and click ‘confirm’.

스크린샷 2016-05-16 오전 11.23.22
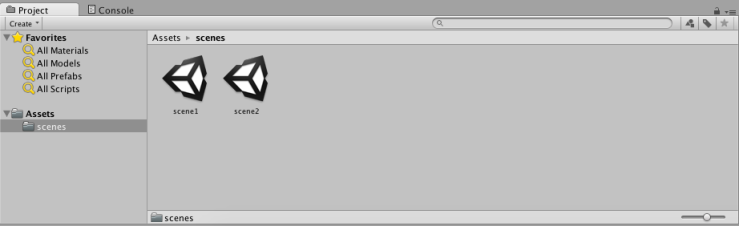
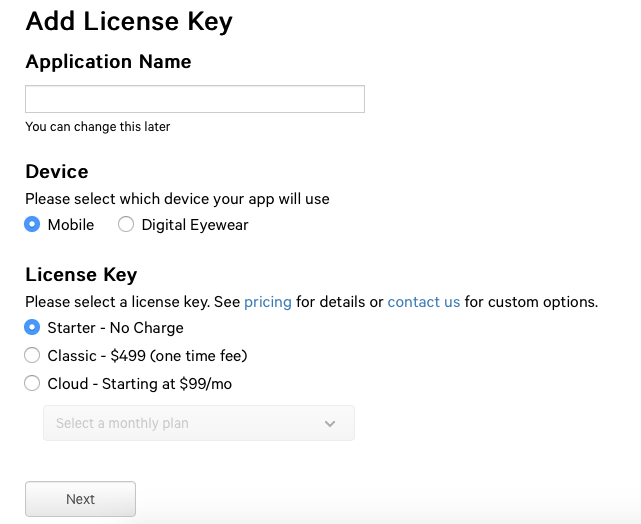
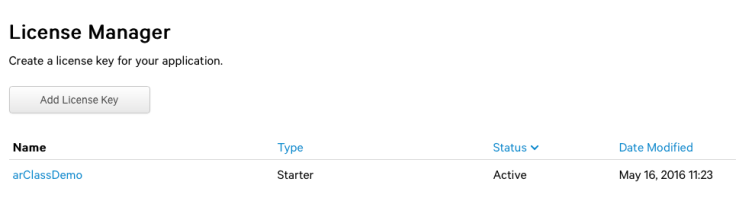
And you can see new license key added.

스크린샷 2016-05-16 오전 11.23.44

In license key, you can see long, strange code. This code is a license key.

스크린샷 2016-05-16 오전 11.24.01

Let’s copy this code.

스크린샷 2016-05-16 오전 11.24.11

Let’s go to Unity again. Select ARCamera in Hierarchy and go to inspector. In inspector, you can find ‘Vuforia Behavior (Script)’. Inside it, there is a ‘app license key’ field. Paste the code that you copied in vuforia homepage.

스크린샷 2016-05-16 오전 11.25.26

Go to Vuforia website again. This time, click ‘Target Manager’ in Develop section.

스크린샷 2016-05-16 오전 11.25.58

In target manager, click ‘Add Database’.

스크린샷 2016-05-16 오전 11.26.17

Write ‘arClassDemoDB’ in the name field and select device in Type. And click Create button.

스크린샷 2016-05-16 오전 11.26.45

Then you can see new database created. Click it.

스크린샷 2016-05-16 오전 11.28.01

In here, click ‘add target’.

스크린샷 2016-05-16 오전 11.29.50

Then you can see this pop-up screen. Bring a rock picture that you downloaded. And set the width ’50’. Click ‘add’.

스크린샷 2016-05-16 오전 11.30.05

You can see new target created. 5 stars rated in ‘rocks’ picture. Camera can recognize this picture more easily when rating is high. The one with rocks have high contrast and have many details, so camera can easily recognize it. If star rating is row in the picture you added, you should change it into another one.

Let’s download the database we added. Click ‘Download Database (All)’.

스크린샷 2016-05-16 오전 11.33.00

You must select ‘Unity Editor’ in platform. And click Download.

스크린샷 2016-05-16 오전 11.35.47

Then this file will be downloaded in your computer.

스크린샷 2016-05-16 오전 11.36.19

Go to Unity and click Assets > Import Package > Custom Package.

스크린샷 2016-05-16 오전 11.36.33

Import the database unity package file that you downloaded.

스크린샷 2016-05-16 오전 11.38.07

Then you will see this assets. Select ‘Imagetarget’ in assets > Vuforia > Prefabs.

스크린샷 2016-05-16 오전 11.38.49

Drag it into the scene and set the position in 0:0:0.

스크린샷 2016-05-16 오전 11.40.27

And select the 3d model that you downloaded in the asset store. Also drag it into the scene.

스크린샷 2016-05-16 오전 11.42.11

In hierarchy, drag ‘kitten’ into ‘ImageTarget’. ‘kitten’ will become a child of ‘Imagetarget’. This is very important.

스크린샷 2016-05-16 오전 11.42.36

And set the position of kitten 0:0:0.

스크린샷 2016-05-16 오전 11.45.20

Next, select ARCamera in hierarchy and go to inspector. In there, you can find ‘Database Load Behavior (Script)’. Check ‘Load arClassDemoDB’. After checking it, ‘Activate’ will appear. Check it, too.

스크린샷 2016-05-16 오전 11.46.55

And select ImageTarget in hierarchy. Go to inspector and find ‘Image Target Behavior (Script)’. Select ‘arClassDemoDB’ in type. And select ‘rocks’ in Database.

스크린샷 2016-05-16 오전 11.47.38

The texture of the plane will change into the picture that you downloaded.

스크린샷 2016-05-16 오전 11.50.15

Build it and install it into your phone.

KakaoTalk_Photo_2016-05-21-21-41-28_31


Look! A cute kitten is sitting in my macbook!

This is the end of the process that we learned last class.

스크린샷 2016-05-21 오후 9.44.27

스크린샷 2016-05-21 오후 7.00.09


This time, I put a skull in my AR. I can’t print my database picture, so I tried it using my iPhone. Cool!

0502_Making a maze using Unity

스크린샷 2016-05-02 오전 1.21.00
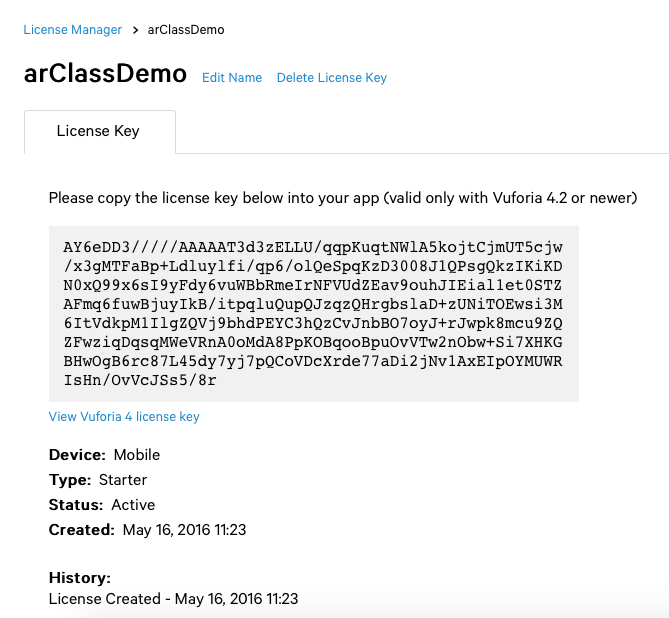
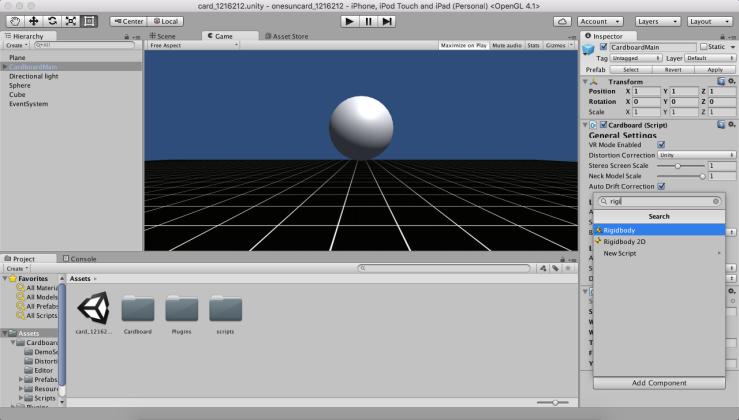
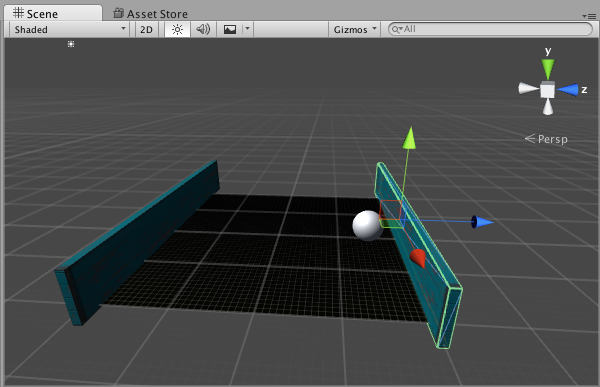
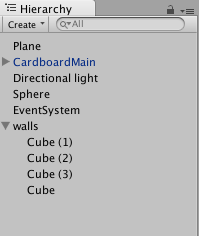
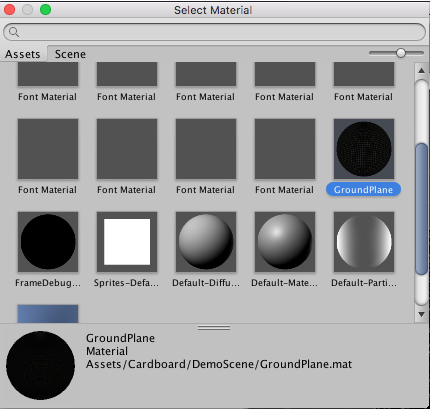
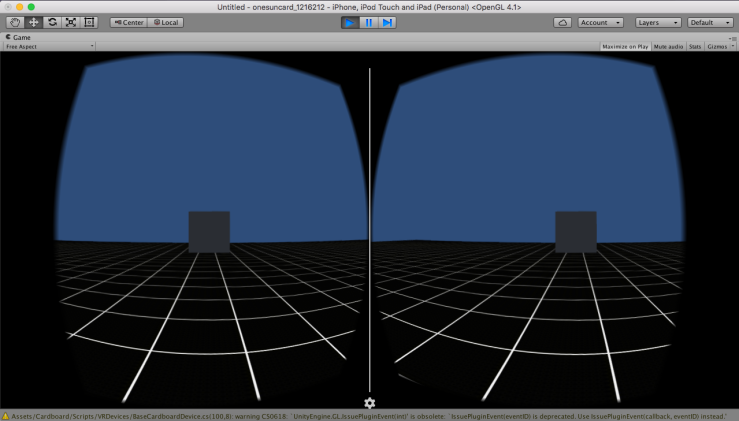
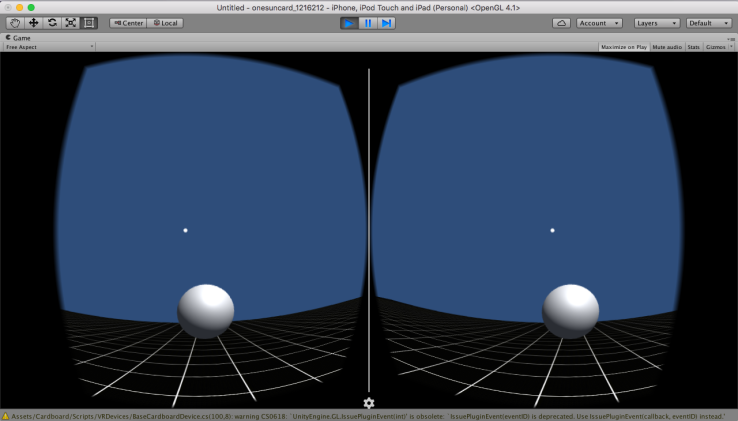
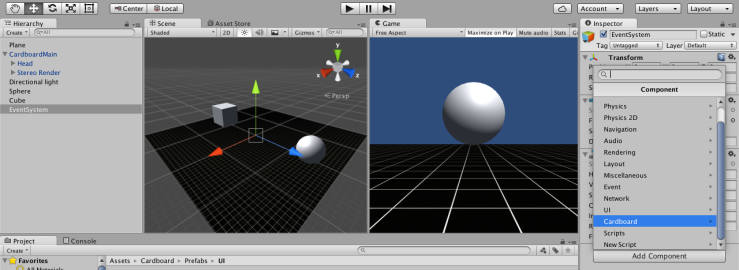
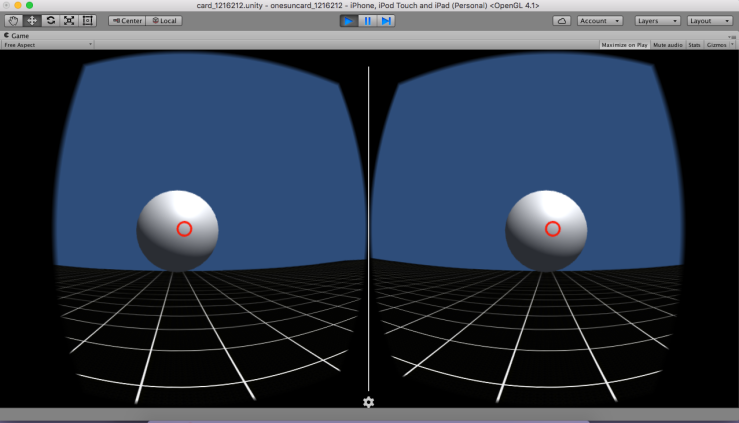
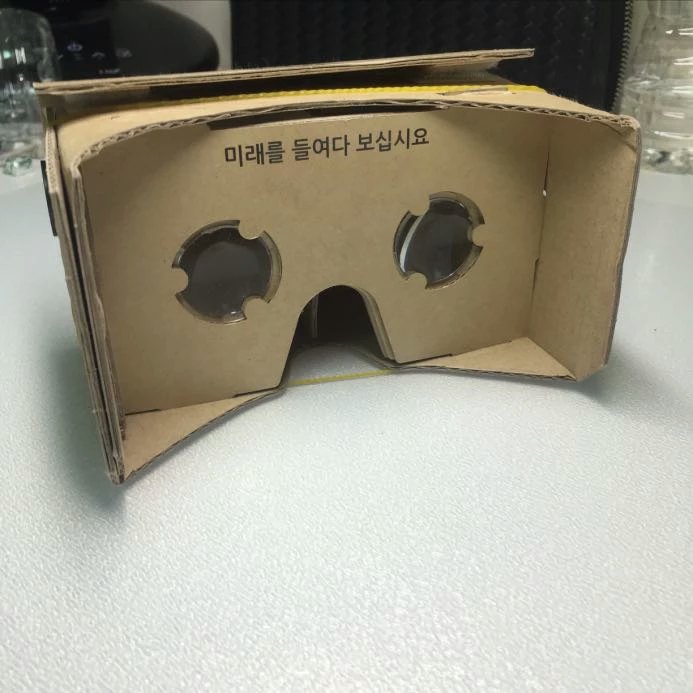
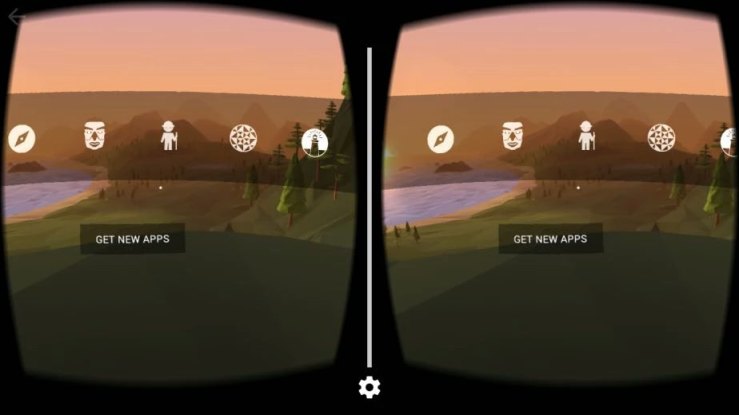
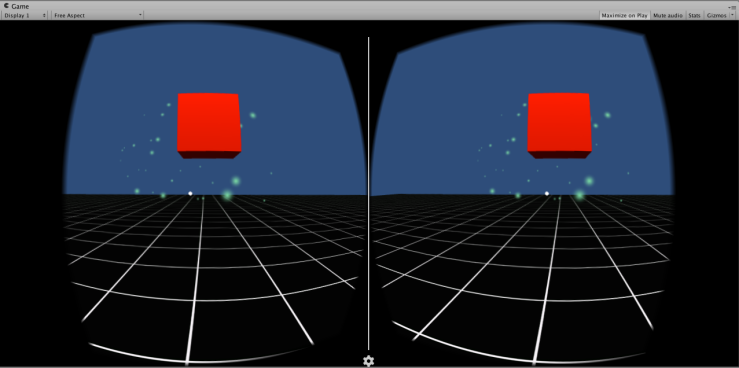
Last time, we learned how to make a maze with Cardboard Main.

스크린샷 2016-05-02 오전 10.31.54

First, select ‘CardboardMain’ in hierarchy and add a component named ‘Rigidbody’. You will affected by gravity after adding this component. And, you can fall down or roll when you bump into other sources.

스크린샷 2016-05-02 오전 10.34.38

And add one more component named ‘capsule collider’ in ‘CardboardMain’. It makes you set the first person character’s height.

스크린샷 2016-05-02 오전 10.42.45

After applying capsule collider and click the play button, you can see cardboard main has a collider same with the picture.

스크린샷 2016-05-02 오전 10.43.51

But, unfortunately, it can’t get up when you fall down or roll in the plane.

스크린샷 2016-05-02 오전 10.50.22

So we will make our rigid body stop from falling down. Check all the boxes in ‘freeze rotation’.

스크린샷 2016-05-02 오전 10.57.08

Next, we will make a maze. I downloaded a texture from the asset store.

스크린샷 2016-05-02 오전 11.05.44스크린샷 2016-05-02 오전 11.02.44

I applied my downloaded texture into the cube that we already have. Let’s make our cube longer and thinner. It will turn into a wall of a maze.

스크린샷 2016-05-02 오전 11.02.51

After making cube look like a wall, duplicate it.

스크린샷 2016-05-02 오전 11.03.12

And place it in the opposite side of the existing wall.

스크린샷 2016-05-02 오전 11.03.30

And duplicate it one more.

스크린샷 2016-05-02 오전 11.03.49

This time, we will rotate it 90 degrees on the y – axis.

스크린샷 2016-05-02 오전 11.04.08

Place it in the upper side of the plane.

스크린샷 2016-05-02 오전 11.04.59

Duplicate it one more and also place it in the opposite side of existing one.

스크린샷 2016-05-02 오전 11.07.27

Next, make an entrance and exit.

스크린샷 2016-05-02 오전 11.08.05

Next, go to GameObject > Create Empty. We will group our walls in here.

스크린샷 2016-05-02 오전 11.08.34

Set the position of game object 0:0:0. Then it will be placed in the center of the scene.

스크린샷 2016-05-02 오전 11.09.33

Change the name of a game object ‘walls’.

스크린샷 2016-05-02 오전 11.10.42

And drag the walls into it. Very easy!

____

Our mid-term assignment was to make a maze using everything we learned in class.

I made a horror maze. I downloaded assets in 3d warehouse and asset store in Unity.

My file size is about 300Mb nevertheless it is a zip file…It’s too big.

But it was fun for me!

This is my dropbox link :

https://www.dropbox.com/s/dq38onw3s85capr/maze_1216212.unitypackage.zip?dl=0


0425_Making a Cardboard Project

Last time, we kept going on making cardboard project. Today, I will post the whole process of making cardboard project that we learned during 2 weeks. Let’s start!

스크린샷 2016-04-18 오후 12.09.05

First, create a new project in Unity.

스크린샷 2016-04-18 오후 12.09.49스크린샷 2016-04-18 오후 12.10.00

Go to File > Build settings and change platform into iOS module.

스크린샷 2016-04-18 오후 12.10.54

Next, go to Import Package > Custom Package.

스크린샷 2016-04-18 오후 12.11.06

And open a package named ‘CardboardSDKForUnity.unitypackage’. This is the package that we downloaded in google website last week.

스크린샷 2016-04-18 오후 12.11.51

When you click the package, you will see this screen. Click ‘import’ button to bring up the sources in the package we downloaded.

스크린샷 2016-04-18 오후 12.13.55

Then you will see the folder named ‘cardboard’ in the assets folder.

스크린샷 2016-04-18 오후 12.14.44

Let’s import one more package that we downloaded last week. Bring a package named ‘CardboardDemoForUnity.unitypackage’. Process is the same.

스크린샷 2016-04-18 오후 12.16.16

After importing the packages, delete the main camera in the Hierarchy folder.

스크린샷 2016-04-18 오후 12.16.48

Next, let’s make a plane. Plane is a object that is smaller than terrain.


스크린샷 2016-04-18 오후 12.17.51

Let’s change the size of a plane. Click plane and go to the inspector. Set the scale 4 * 1 * 4.

스크린샷 2016-04-18 오후 12.20.16

After setting the size of a plane, find the ‘Mesh Renderer’ in the inspector. Click the small circle in the Element 0.

스크린샷 2016-04-18 오후 12.22.21

After clicking it, select ‘GroundPlane’ in the materials. It will make your plane black.

스크린샷 2016-04-18 오후 12.24.14

Next, go to assets > cardboard > Prefabs > CardboardMain. Click Cardboard main and drag it to the scene.

스크린샷 2016-04-18 오후 12.24.30

In the inspector, you will see the scale of the cardboard main. Set the scale 1 * 1 * 1.

스크린샷 2016-04-18 오후 12.31.53

When you click the play button after finishing this project, you will see the screen same with this picture. You can tilt the screen by pressing ‘alt’ button in the keyboard.

스크린샷 2016-04-18 오후 12.33.02

Now, let’s add some object in the scene. Go to GameObject > 3D Object and select the object that you want. I selected sphere.

스크린샷 2016-04-18 오후 12.34.18

Click the sphere and go to the inspector. Set the position 1 * 1 * 5.

스크린샷 2016-04-18 오후 12.34.32

You will see this screen when you click the play button.

스크린샷 2016-04-18 오후 12.36.22

Let’s add another object. Process the same. This time, I selected a cube.

스크린샷 2016-04-18 오후 12.36.49

Click cube and go to the inspector. This time, I will place cube in 1 * 1 * 5.

스크린샷 2016-04-18 오후 12.37.14

You will see the cube when you press the play button.

스크린샷 2016-04-18 오후 12.41.54

Next, let’s make a dot in the cardboard scene. Dot is used to select the object in the scene.  Let’s go to cardboard > Prefabs > UI.

스크린샷 2016-04-18 오후 12.42.05

In the UI folder, you will see CardboardReticle.

스크린샷 2016-04-18 오후 12.44.43

Click it and drag it into the main camera folder in Hierarchy

스크린샷 2016-04-18 오후 12.45.19

Then we can see a cute, tiny dot in the scene!

스크린샷 2016-04-18 오후 12.49.38

You can change its color in the cardboard reticle material in the inspector.

This is the process that we learned in last week. Now, let’s go further. We made a dot and we will make it respond to the object. This is called ‘raycasting’ in unity program.

스크린샷 2016-04-25 오전 10.28.06

Before we get into the process, I will change the size of sphere. Go to inspector and set the size 5 * 5 * 5.

스크린샷 2016-04-25 오전 10.35.42

After re-sizing sphere, right-click the empty space of Hierarchy and go to UI > Event system.

스크린샷 2016-04-25 오전 10.37.35

Then you will see ‘EventSystem’ in the Hierarchy. Click it and go to the inspector. Click ‘add component’.

스크린샷 2016-04-25 오전 10.38.28

In the ‘Add Component’, click cardboard > GazeInputModule.

스크린샷 2016-04-25 오전 10.42.27

Next, select the main camera inside the cardboard main and add one more component named ‘Physics Raycaster’.

스크린샷 2016-04-25 오전 10.44.28

And in the occlusion mask, select ‘Nothing’.

스크린샷 2016-04-25 오전 10.48.30

Next, click the cube and add a component named ‘event trigger’.

스크린샷 2016-04-25 오전 10.50.20

Then you will see this thing in the inspector. Click ‘Add New Event Type’ and select ‘PointerEnter’.

스크린샷 2016-04-25 오전 10.52.05

Then you will see the empty place of ‘pointer enter’. Click the plus button and select the object that you clicked before. I selected a cube.

스크린샷 2016-04-25 오전 10.54.26

Next, click the ‘No function’ in the Pointer Enter and select BoxCollider > bool isTrigger. The word ‘bool’ means a type of information that only response true and false.

스크린샷 2016-04-25 오전 10.58.19

After this process, you will see the red dot get bigger when pointing the object. Apply this process in the sphere, too.

Next, we will make our first person character walk when we tilt the phone down.

스크린샷 2016-04-25 오전 11.33.57

First, download the code that the professor uploaded on his homepage. Its address is this:

Syllabus

You can download the code on the resources section.

스크린샷 2016-04-25 오전 11.35.26

After downloading it, select the file and drag it into the scripts folder in the assets folder. You have to make a new folder named ‘scripts’ before downloading the code.

스크린샷 2016-04-25 오전 11.38.08

When you click the code file, an application named ‘monoDevelop’ will automatically opened. In here, you can see the code. You can change or delete the code in there. Let’s add a code in the cardboard main.

스크린샷 2016-04-25 오전 11.40.39

Click the Cardboard main in the Hierarchy and add a component named ‘autowalk’.

스크린샷 2016-04-30 오후 8.48.33

In the inspector, you will see this section. Set the speed in 3 and check ‘Walk when look down’. It will make our character walk when we look down.

스크린샷 2016-04-25 오전 11.47.49스크린샷 2016-04-25 오전 11.48.12

And go to file > Build settings and build the project into the phone.

I have a little error making an object that moves when tilting the phone. I will add a process in my blog after fixing errors.

0411_Google Cardboard

Last time, we learned about Google Cardboard. Google cardboard is a device that can experience virtual reality in a simple way. It is made of cardboard and we can make it by folding it.

6Xr5Ac2_2F81bN_4SpSsP_480249

This is the cardboard. You can just fold the line in the cardboard.

6Xr5Ac2_6DV72t_614xtL_480249

This is the complete version of google cardboard.

6Xr5Ac2_23obn8_3EXz41_480249

The double-sided tape inside the cardboard seemed too weak, so I fastened it with rubber band. In the left side of the cardboard, you will see two magnets. It will work as a button of your virtual reality.

We finished making google cardboard. Let’s download some apps to make us experience VR.

6Xr5Ac2_9CVw8_5fKC8X_480480

The app in the middle of the third row, is ‘Google cardboard’ app. It provides us a demo of VR and other programs to experience.

6Xr5Ac2_6UeUSv_33xVTS_480480

When you play app, you will see this screen. You can play cardboard demo by touching the first one on the app.

6Xr5Ac2_4ppiRE_2Wy8jG_480480

Without google cardboard, you will see double screen in your iPhone. But, using google cardboard, you will see that screen in 3D environment.

You can experience your world in Unity by using this cardboard. The Cardboard SDK for Unity allows you to easily bring your Unity 3D projects to VR on Android and iOS. Let’s bring our Unity demo to our phone.


스크린샷 2016-04-17 오전 1.12.29

First, go to developers.google.com and install cardboard SDK. You have to install unity package. After downloading it, go to Unity.

스크린샷 2016-04-17 오전 1.16.10.png

Go to assets > Import Package > Custom package. And click the Unity package of demo file you downloaded.

스크린샷 2016-04-12 오후 8.38.18

Then you will see this screen.

스크린샷 2016-04-11 오후 12.19.11

Go to file > build settings.

스크린샷 2016-04-11 오후 12.03.56

You will see this screen. Oops! It says ‘No iOS module loaded’. When you see this message, you have to re-install Unity. And you have to check ‘iOS module’ when downloading Unity.

스크린샷 2016-04-15 오후 2.57.28

After re-installing it, you will see this screen. Let’s change some settings in the player settings. Click ‘Player Settings’. You can see settings in the inspector. You can see iPhone settings by clicking the iPhone icon in the inspector. Let’s change some settings. First, check ‘Landscape Left’ and uncheck the other rotation settings. And you must check ‘Requires Fullscreen’ and ‘Status bar hidden’.

스크린샷 2016-04-15 오후 2.57.39

Next, go to ‘other settings’. Check ‘auto graphic API’, ‘Static Batching’ and ‘Dynamic Batching’ is checked. And select ‘iPhone only’ in the target device. We are done with the settings! Click ‘Build’ button.

스크린샷 2016-04-15 오후 3.00.11

After building your project, Unity will give you an Xcode project file. You can just click the play button in the Xcode after connecting your iPhone.

스크린샷 2016-04-16 오후 11.24.13

Oops! Xcode says it could not launch my demo file! In this case, you have to change some settings in your iPhone. Go to General > Device Management and select your developer app certificate to trust it. You will successfully put your demo file after changing device settings.

6Xr5Ac2_WKjUR_CApkK_480480

스크린샷 2016-04-11 오후 12.15.38

See? I finally succeeded putting demo in my iPhone! Pretty nice~


0404_Making my own world

Last time, we learned how to make water and how to export it on our computer. First, let’s make water in the game world.

스크린샷 2016-04-12 오후 2.06.31

First, prepare terrain where you want to put water.

스크린샷 2016-04-12 오후 2.06.59스크린샷 2016-04-12 오후 2.07.11스크린샷 2016-04-12 오후 2.07.24

Next, go to the project and click assets > standard assets > environment > water > water > prefabs.

스크린샷 2016-04-12 오후 2.07.52

In prefabs folder, you can see two prefabs. First one is the water in the daytime, and second one is the water in the nighttime. We will put water in daytime, so click the first one and drag it to the terrain where you want to put water.

스크린샷 2016-04-12 오후 2.08.17

Adjust water size that fits to your terrain. In the inspector, you will see the options of water. Select Refractive in the Water Mode.

스크린샷 2016-04-12 오후 2.13.40

And when you click WaterProDaytime texture, you can control the wave scale and the other options of water texture.

스크린샷 2016-04-12 오후 2.19.40

This is the water I made! Awesome!

Finally, Let’s build our game.

스크린샷 2016-04-12 오후 2.31.57

Go to File > Build Settings.

스크린샷 2016-04-12 오후 2.32.26

Then you will see this window. We will build our game in PC, so select ‘PC, Mac & Linux Standalone’.

스크린샷 2016-04-12 오후 2.33.34

On the top of the window, you will see ‘Scenes In build’. We want to see our scene, so click ‘Add Open Scenes’ button and add our scene that we saved on our computer. Next, un-check the other sample scenes.

스크린샷 2016-04-12 오후 2.34.16.png

And let’s put icon in our game. Click ‘Player Settings’ in the window. You will see the player setting options in the inspector on your right side. In ‘Default Icon’, you can add an icon which you want to put.

That’s it! This is the end of making our own world!

스크린샷 2016-04-12 오후 2.42.25스크린샷 2016-04-12 오후 2.42.53스크린샷 2016-04-12 오후 2.43.25스크린샷 2016-04-12 오후 2.43.35스크린샷 2016-04-12 오후 2.43.50스크린샷 2016-04-12 오후 2.44.13스크린샷 2016-04-12 오후 2.44.38스크린샷 2016-04-12 오후 2.46.17스크린샷 2016-04-12 오후 2.46.31

I made fantastic sweet world. I downloaded assets in 3d warehouse and blend swap. It was hard to find assets in good quality. And my computer was facing some technical problem, so I worked it so hard with my effort. But it was a fun work for me and I’m very proud of my work.


0328_Colliders and borders

Last time, we learned about collider and borders in Unity. Collider is like a border of the object. When we play game in Unity, we pass through the object when we walk around the game world. But we don’t want to pass through it. So we have to add a collider in the object. Let’s add a collider in the 3D object.

스크린샷 2016-04-02 오후 8.40.42

First, go to the toolbar and click GameObject > 3D Object > Sphere. You can select cube, capsule or cylinder if you want to make that kind of object.

Click ‘Add component’ in the inspector and select Physics > Sphere Collider.

스크린샷 2016-04-02 오후 11.22.45

Then you will see this tap added in the inspector. In here, we can set a shield range of an object. We can’t pass through an object when adding this.

스크린샷 2016-04-02 오후 11.30.01

After adding the collider, you can see the green line(Collider range) When you click the object. Now you don’t have to pass through the object! Just jump it and go your way.

Let’s apply the collider to your object that you bought in the asset store.

스크린샷 2016-04-02 오후 11.37.44

Select another object which you want to add collider in it. I selected my stones.

In this case, you have to select ‘Mesh Collider’, Not ‘Sphere Collider’.

스크린샷 2016-04-02 오후 11.42.55

When you click it, you will see ‘Mesh Collider’ tap is placed in the inspector. You must check ‘convex’. You can add the collider similar to your object shape when you check it. You can see the green line when you check it. Great! You’ve done making collider to your object.

When we play game, we want to stop when we arrive at the end of the game world. But we fall down and down when we are in the end of the game world. To avoid this, we will make a border of our world. Let’s start making it.

스크린샷 2016-04-02 오후 11.49.34.png

Go to the toolbar and select GameObject > Create Empty. This ’empty’ will turn into the border of our game world. We will make 4 borders, so create 4 empty.

스크린샷 2016-04-03 오전 12.18.04.png

Go to Hierarchy and change its name ‘border_(number)’. Change name of the other 4 empties. Select empty and add box collider.

스크린샷 2016-04-03 오전 1.30.02

Set the size 500 * 500 * 1 and put it in the edge of the game world. Check the border is placed on the edge of the game world.

스크린샷 2016-04-03 오전 1.31.54

Process is the same. Make 4 empties using this process and place it in front, back, left and right side of the world. Then, making borders are finished! Easy Peasy Lemon Squeezy~

Here is my Dropbox link :

https://www.dropbox.com/s/f1wbe83ugidezsy/newworld_1216212.unitypackage.zip?dl=0


Putting Sound effect in the 3D Object_0321

Last class, we learned how to put sound effect in the 3d object inside our game world. I re-designed my new world and decided to put sound effect in my tiny green-colored mailbox. I first downloaded a sound file in the website. I want to make my world fun, so I downloaded a man sound who is giggling very meanly.

스크린샷 2016-03-26 오후 3.50.44

Here is my sound that I downloaded. After you downloaded your sound, run Unity.

스크린샷 2016-03-26 오후 3.51.17

Let’s put some sound in that mailbox. First, click the ‘assets’ file in your project.

스크린샷 2016-03-26 오후 3.51.58

Create new folder named ‘audio’ in your ‘assets’ folder.

스크린샷 2016-03-26 오후 3.52.31

Select your audio file and drag it into the ‘audio’ folder that you made. Now, you can see your audio file placed in the new folder you created.

스크린샷 2016-03-26 오후 3.52.49   스크린샷 2016-03-26 오후 3.53.09   스크린샷 2016-03-26 오후 3.53.28

Click the object which you want to put the sound in it. And you will see the ‘inspector’ in your right side of the screen. In the under side of the ‘inspector’, you will see the ‘add component button’. Click the button and select ‘audio’. In the ‘audio’ category, you can see the ‘audio source’. It can make you put some sound into the object. Click it!

스크린샷 2016-03-26 오후 3.53.55

After clicking it, you can see new window named ‘audio source’ inside the ‘inspector’. In here, you can put or control the audio file that you added. Let’s put the audio. Click the tiny circle beside the audioClip box. When you click it, ‘Select AudioClip’ window will appear into the screen. Find the audio file that you want to put and click it.

스크린샷 2016-03-26 오후 3.54.27

You can see ‘AudioClip’ box name has changed into the file name that you selected. Check ‘Play on Awake’ box and ‘Loop’ box. When you check ‘Play on Awake’ box, the program will play the audio when it starts up. And when you check ‘Loop’ box, it will make your audio keep playing. Check this two box checked.

스크린샷 2016-03-26 오후 4.49.16

Under the ‘Loop’, you can see more elements used to control the sounds. Set the ‘Volume’ at 1. It can control the volume of an audio file. So it is very important! Next, ‘Stereo Pan’ can control the sound output of the speaker ( left of right speaker ) . See the ‘Spatial Blend’. If you want to create a 3D sound, click ‘3D’. 3D sound can allow us to create a sound environment. Set ‘Doppler Level’ in 1, and ‘Spread’ in 0. Select ‘Custom Rolloff’ inside the ‘Volume Rolloff’. Now, let’s control the sound distant. I want to hear the sound when I get close to the mailbox. So I set the ‘Max Distance’ 20. And I control the graph to hear the sound from 20m distance. After finishing this process, you can hear the sound in your game world.

And one tip for you! When yo click the pause and change something, the program does not save your change. So, remember to un-click the pause button when you change something.

This is my dropbox link :

https://www.dropbox.com/s/cihj7wf1fujn945/myFirstworld_1216212.unitypackage?dl=0